
2.2.6.2. mijin Catapult(v.2) encryption of node storage
- creation-day:
Aug. 1, 2022
- update date:
September 9, 2022
2.2.6.2.1. Flow of encrypting a node’s blockchain data
Create KMS Key
Stop one of the nodes. (In the production version, availability is maintained even if one node is stopped.)
Obtain a snapshot of a stopped node
Create an encrypted snapshot by copying the snapshot created in 3.
Create a volume from the encrypted snapshot created in step 4.
Detach the volume of blockchain data on the PEER node stopped in 2.
Attach the volume created in step 5 to the PEER node stopped in step 2
Start the PEER node stopped in 2.
Note
The same process is followed on the API node, but in the case of the API node, the mongo data is also mounted, so the two volumes can be encrypted.
2.2.6.2.2. Create KMS Key
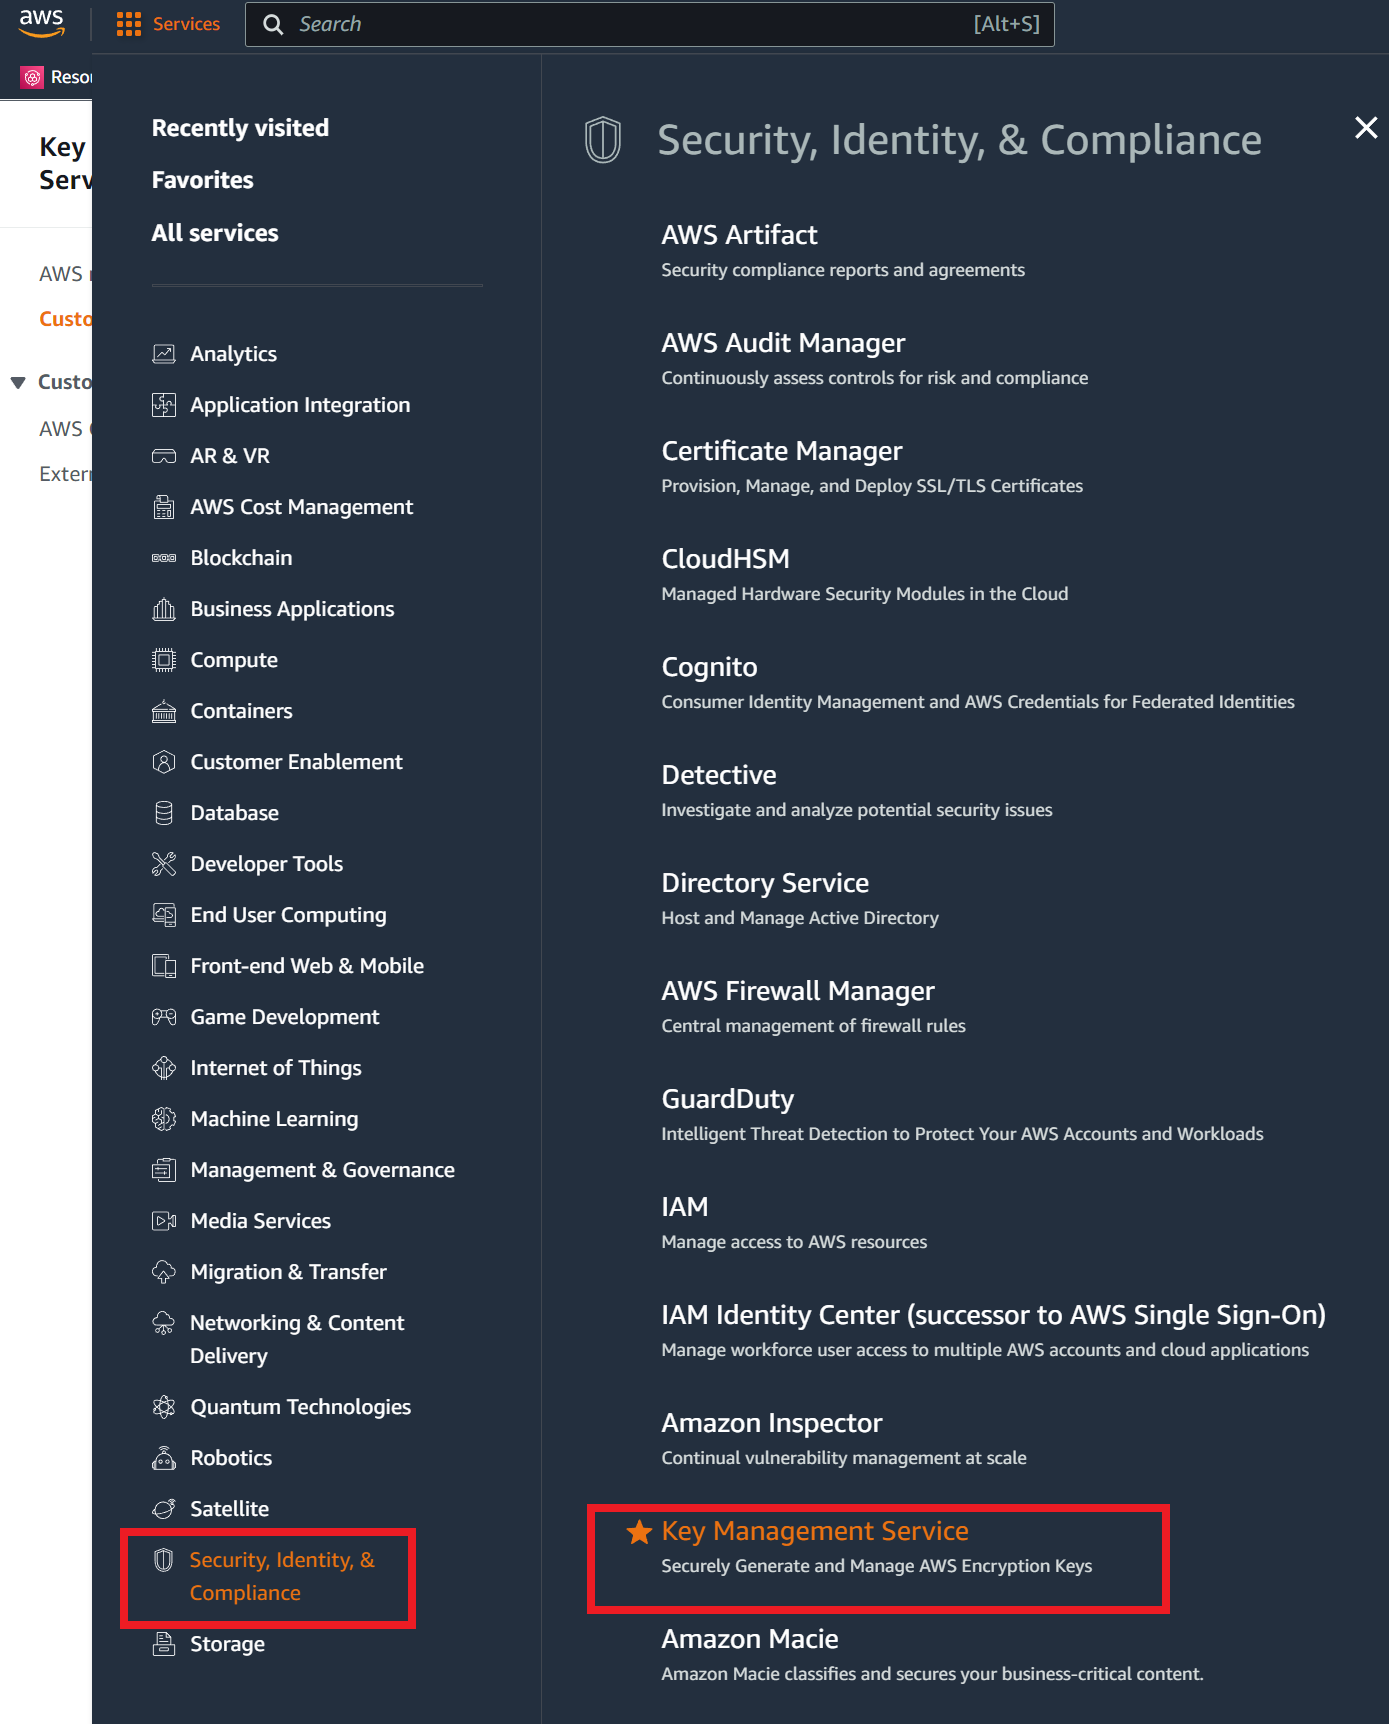
From Services, click Security, Identity, & Compliance, then Key Management Service. |
|
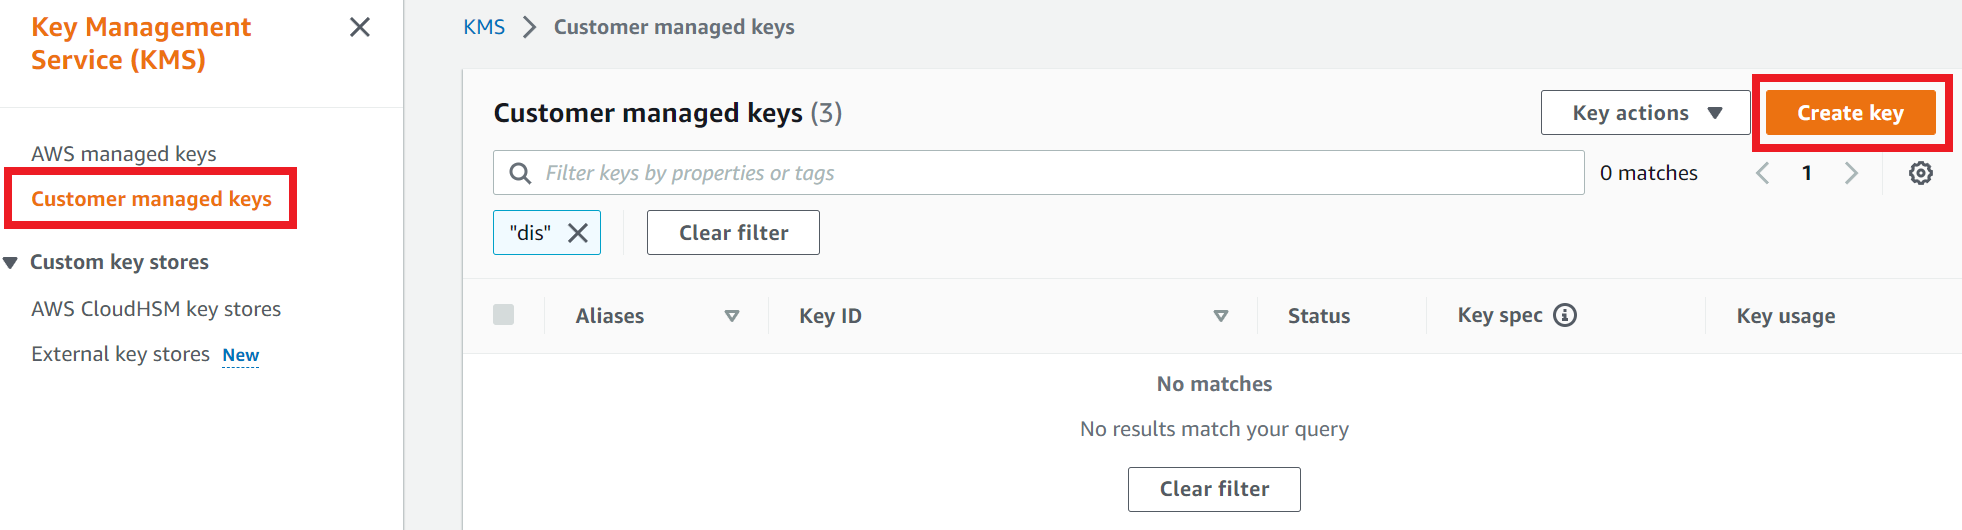
Click on a ‘Customer managed keys’ and click on ‘Create Key’. |
|
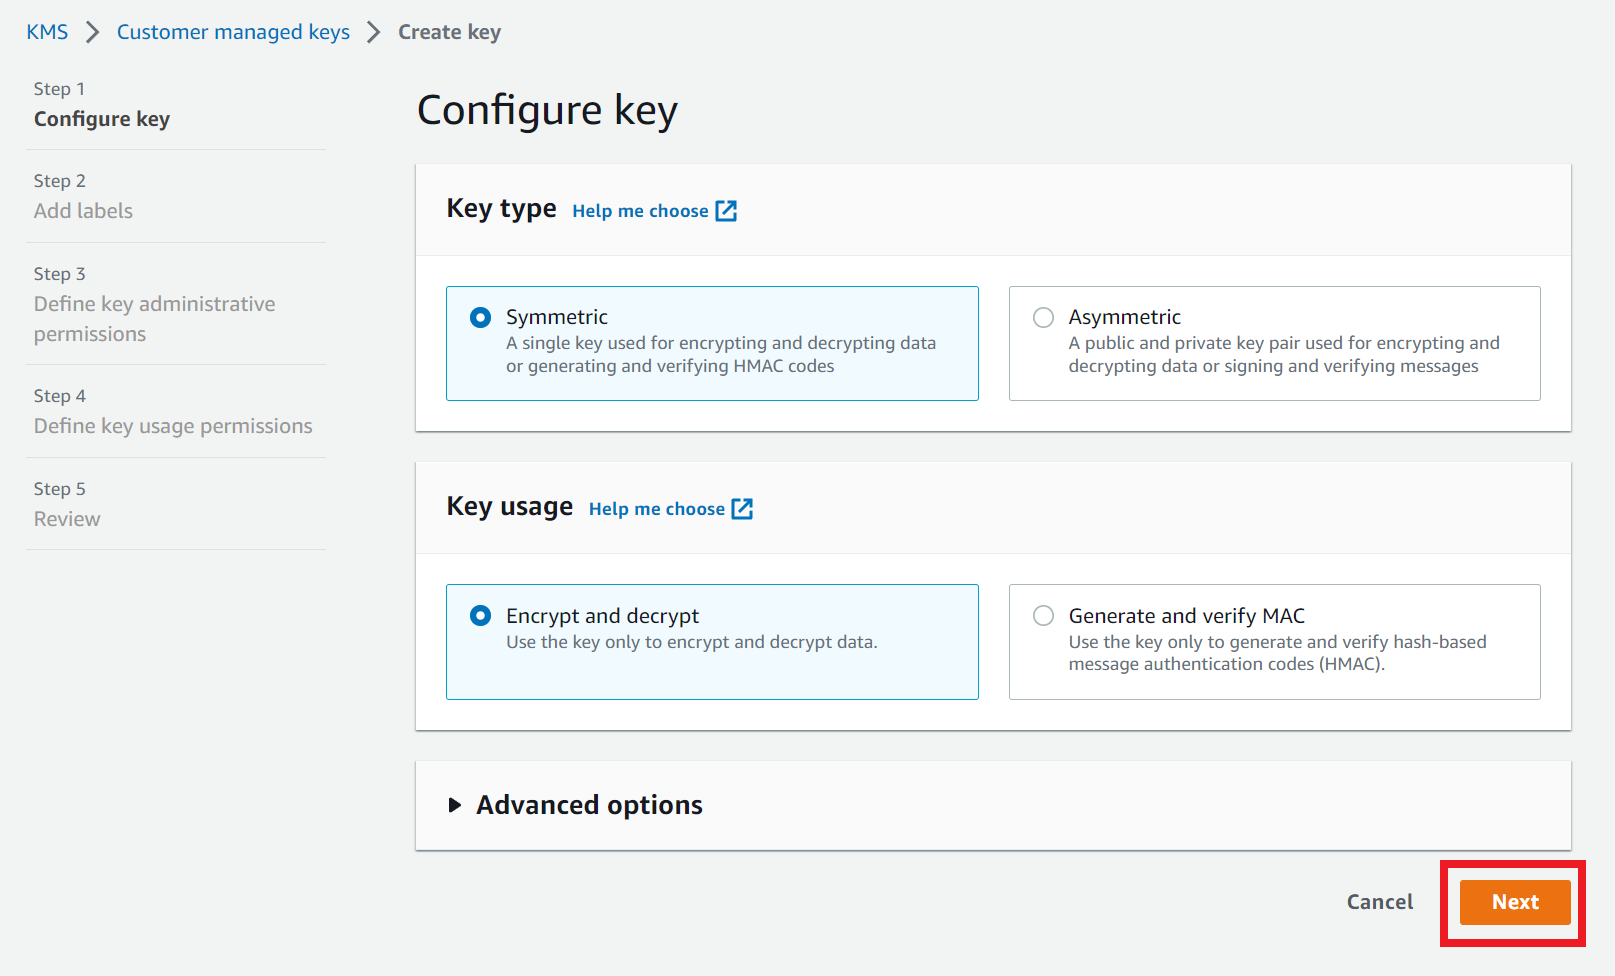
Set any name for the alias and click ‘Next’. |
|
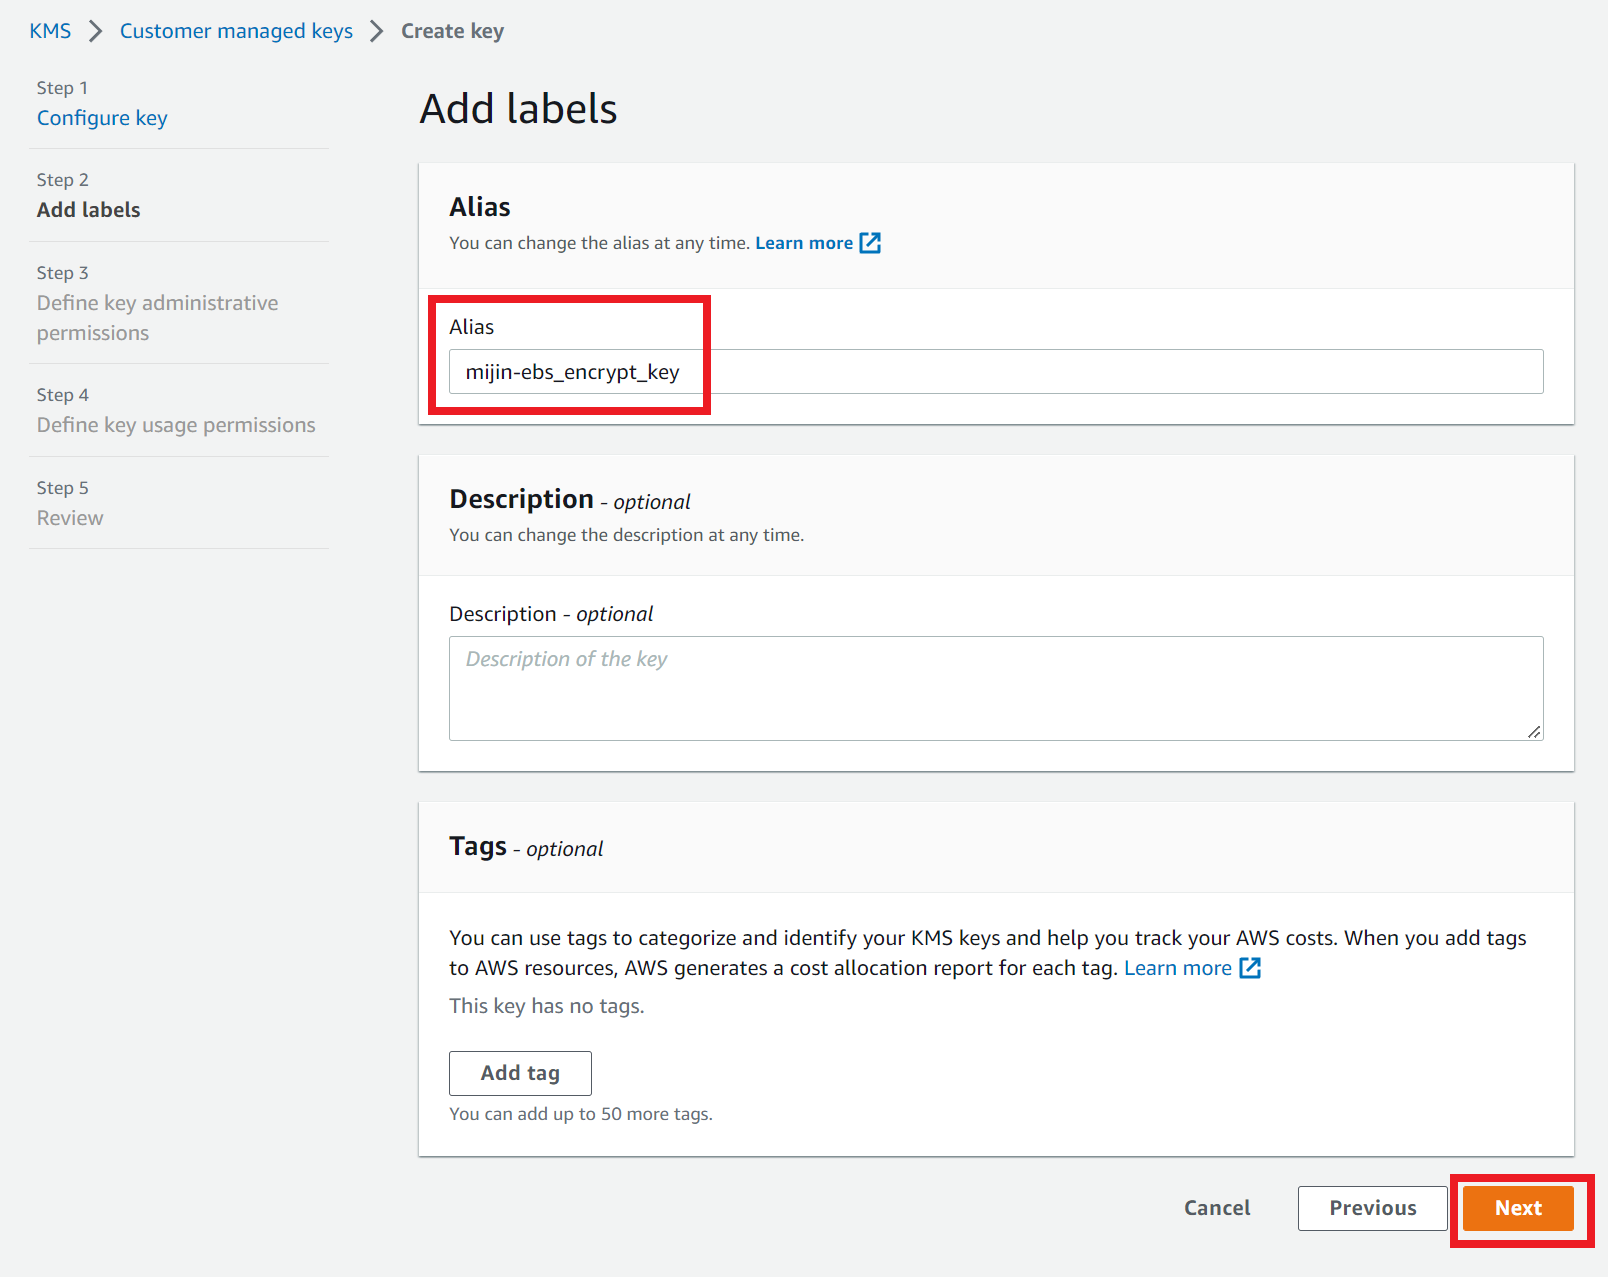
Specify a key name (alias) and click ‘Next’. |
|
Select your own account as the key administrator and click ‘Next’. (In this case, specify the account you are currently logged in to) |
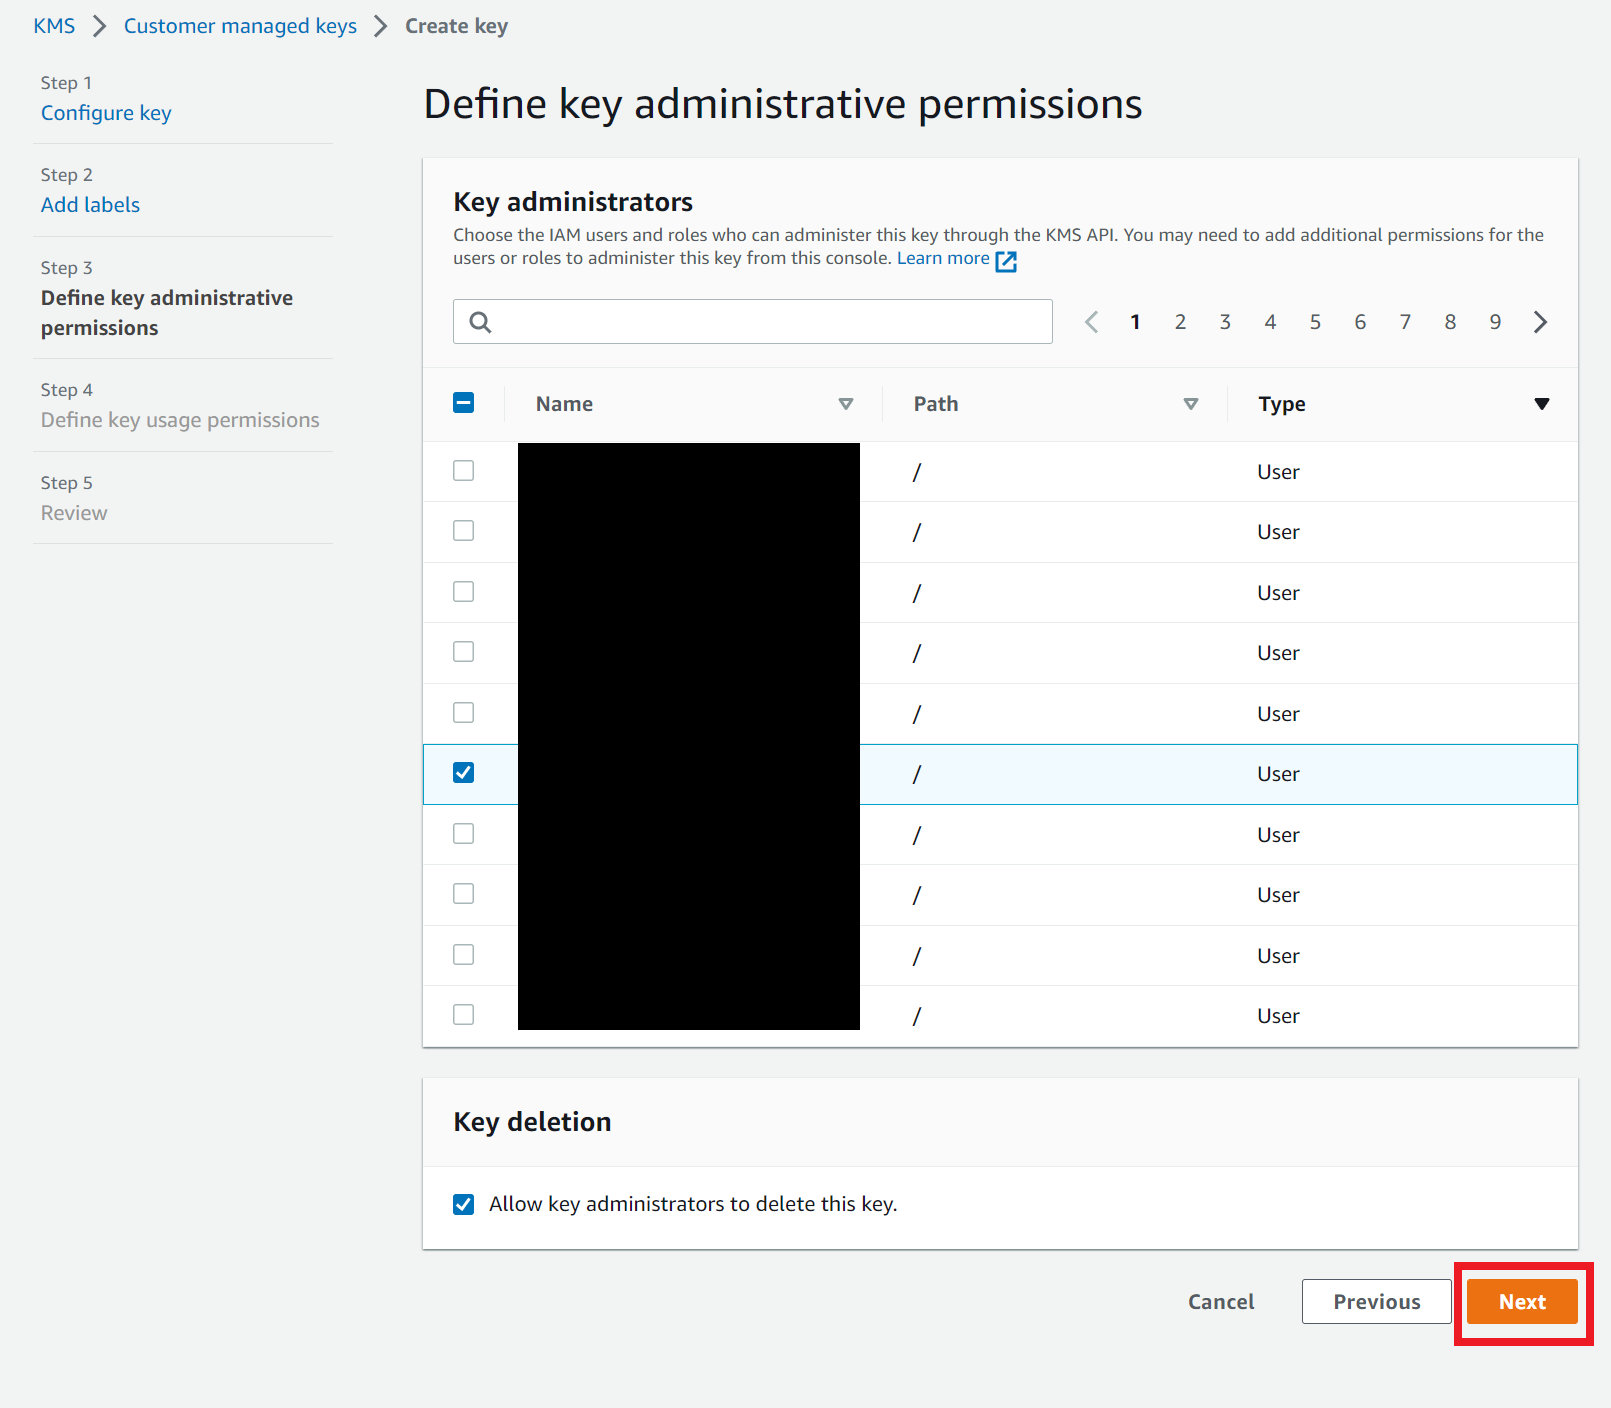
|
Select the account for which you want to use the key and click ‘Next’. (In this case, specify the account you are currently logged in to) |
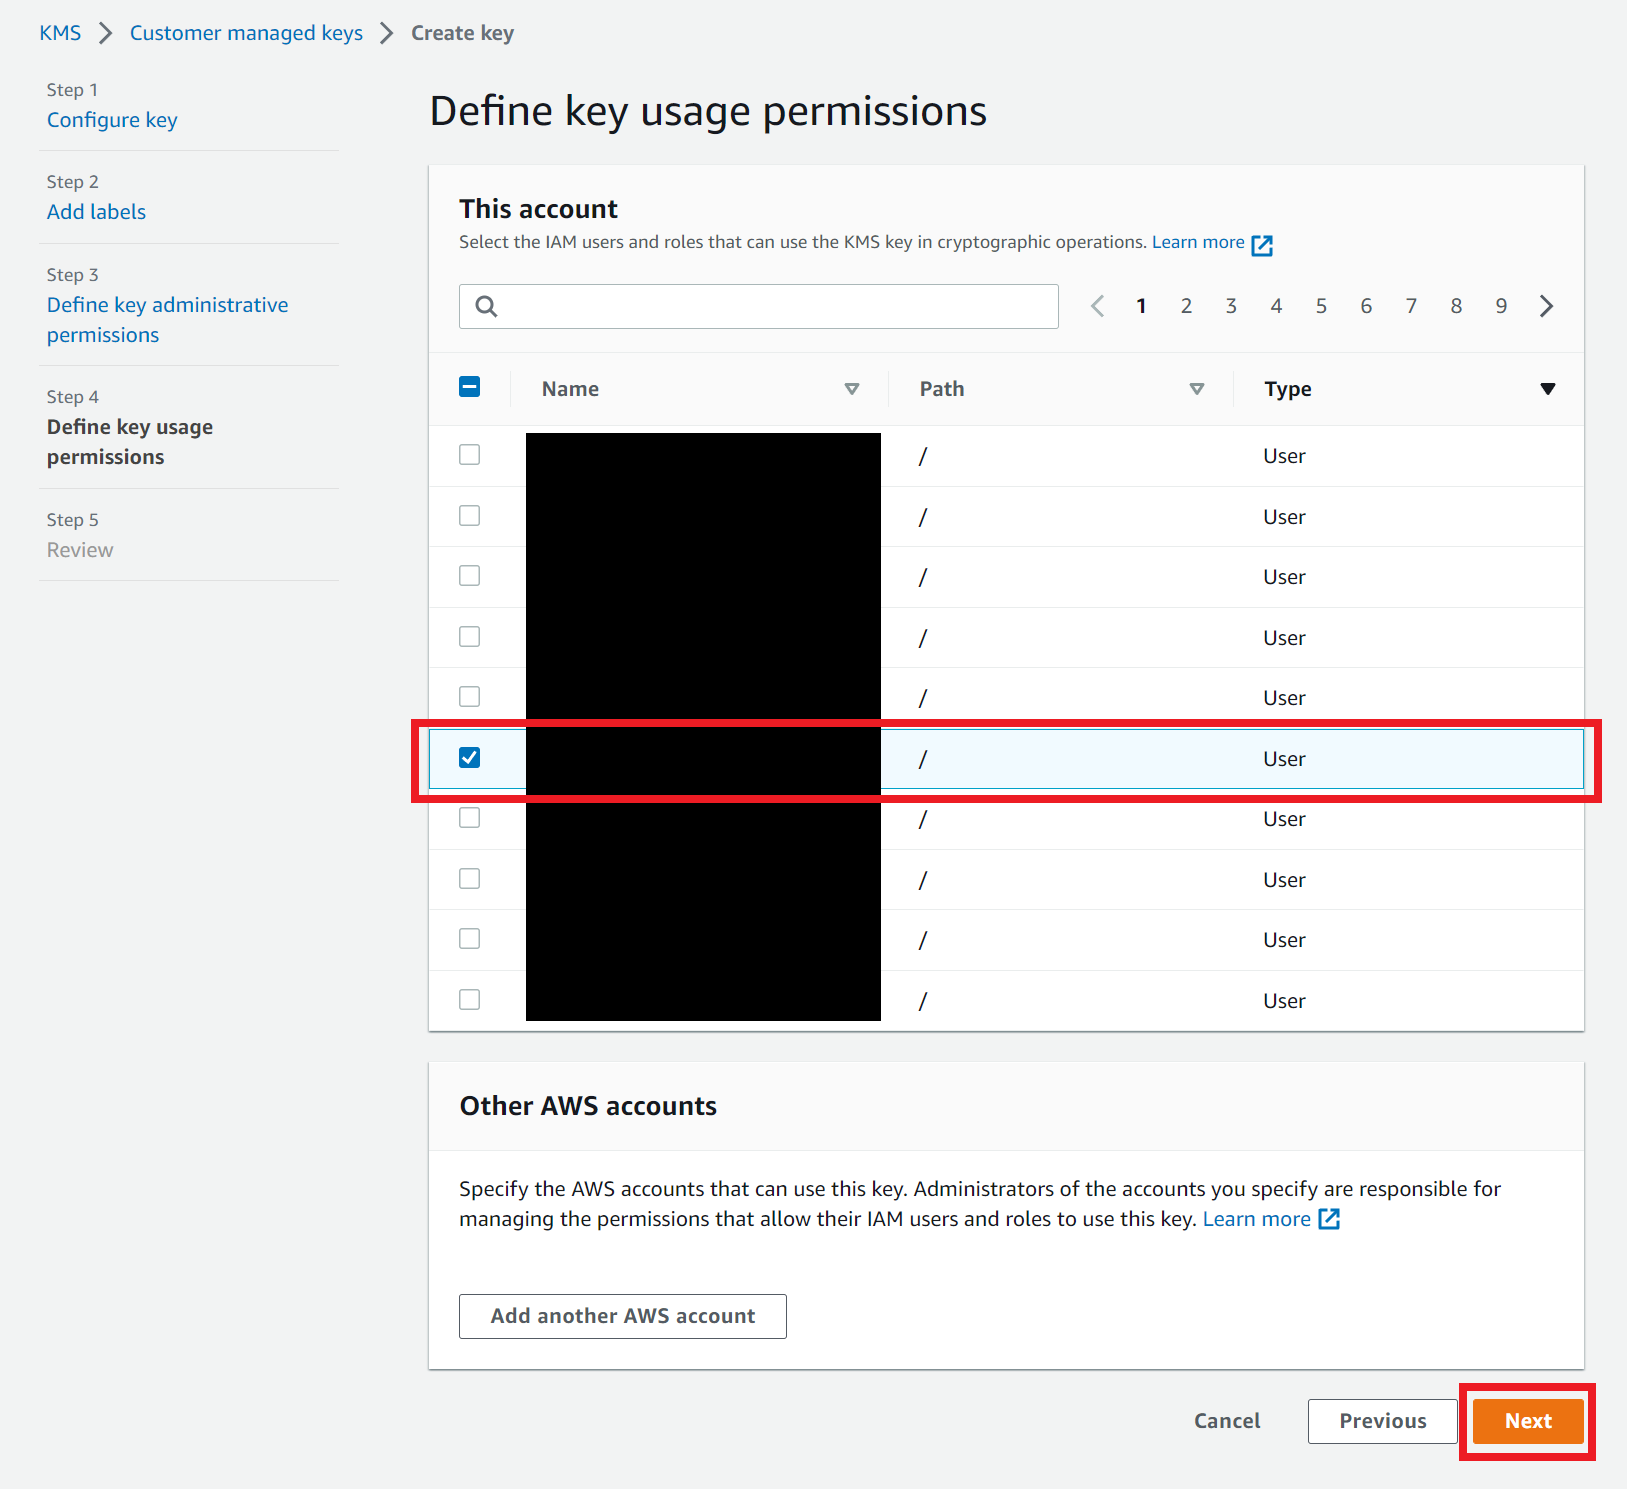
|
Confirm the values and click ‘Finish’. |
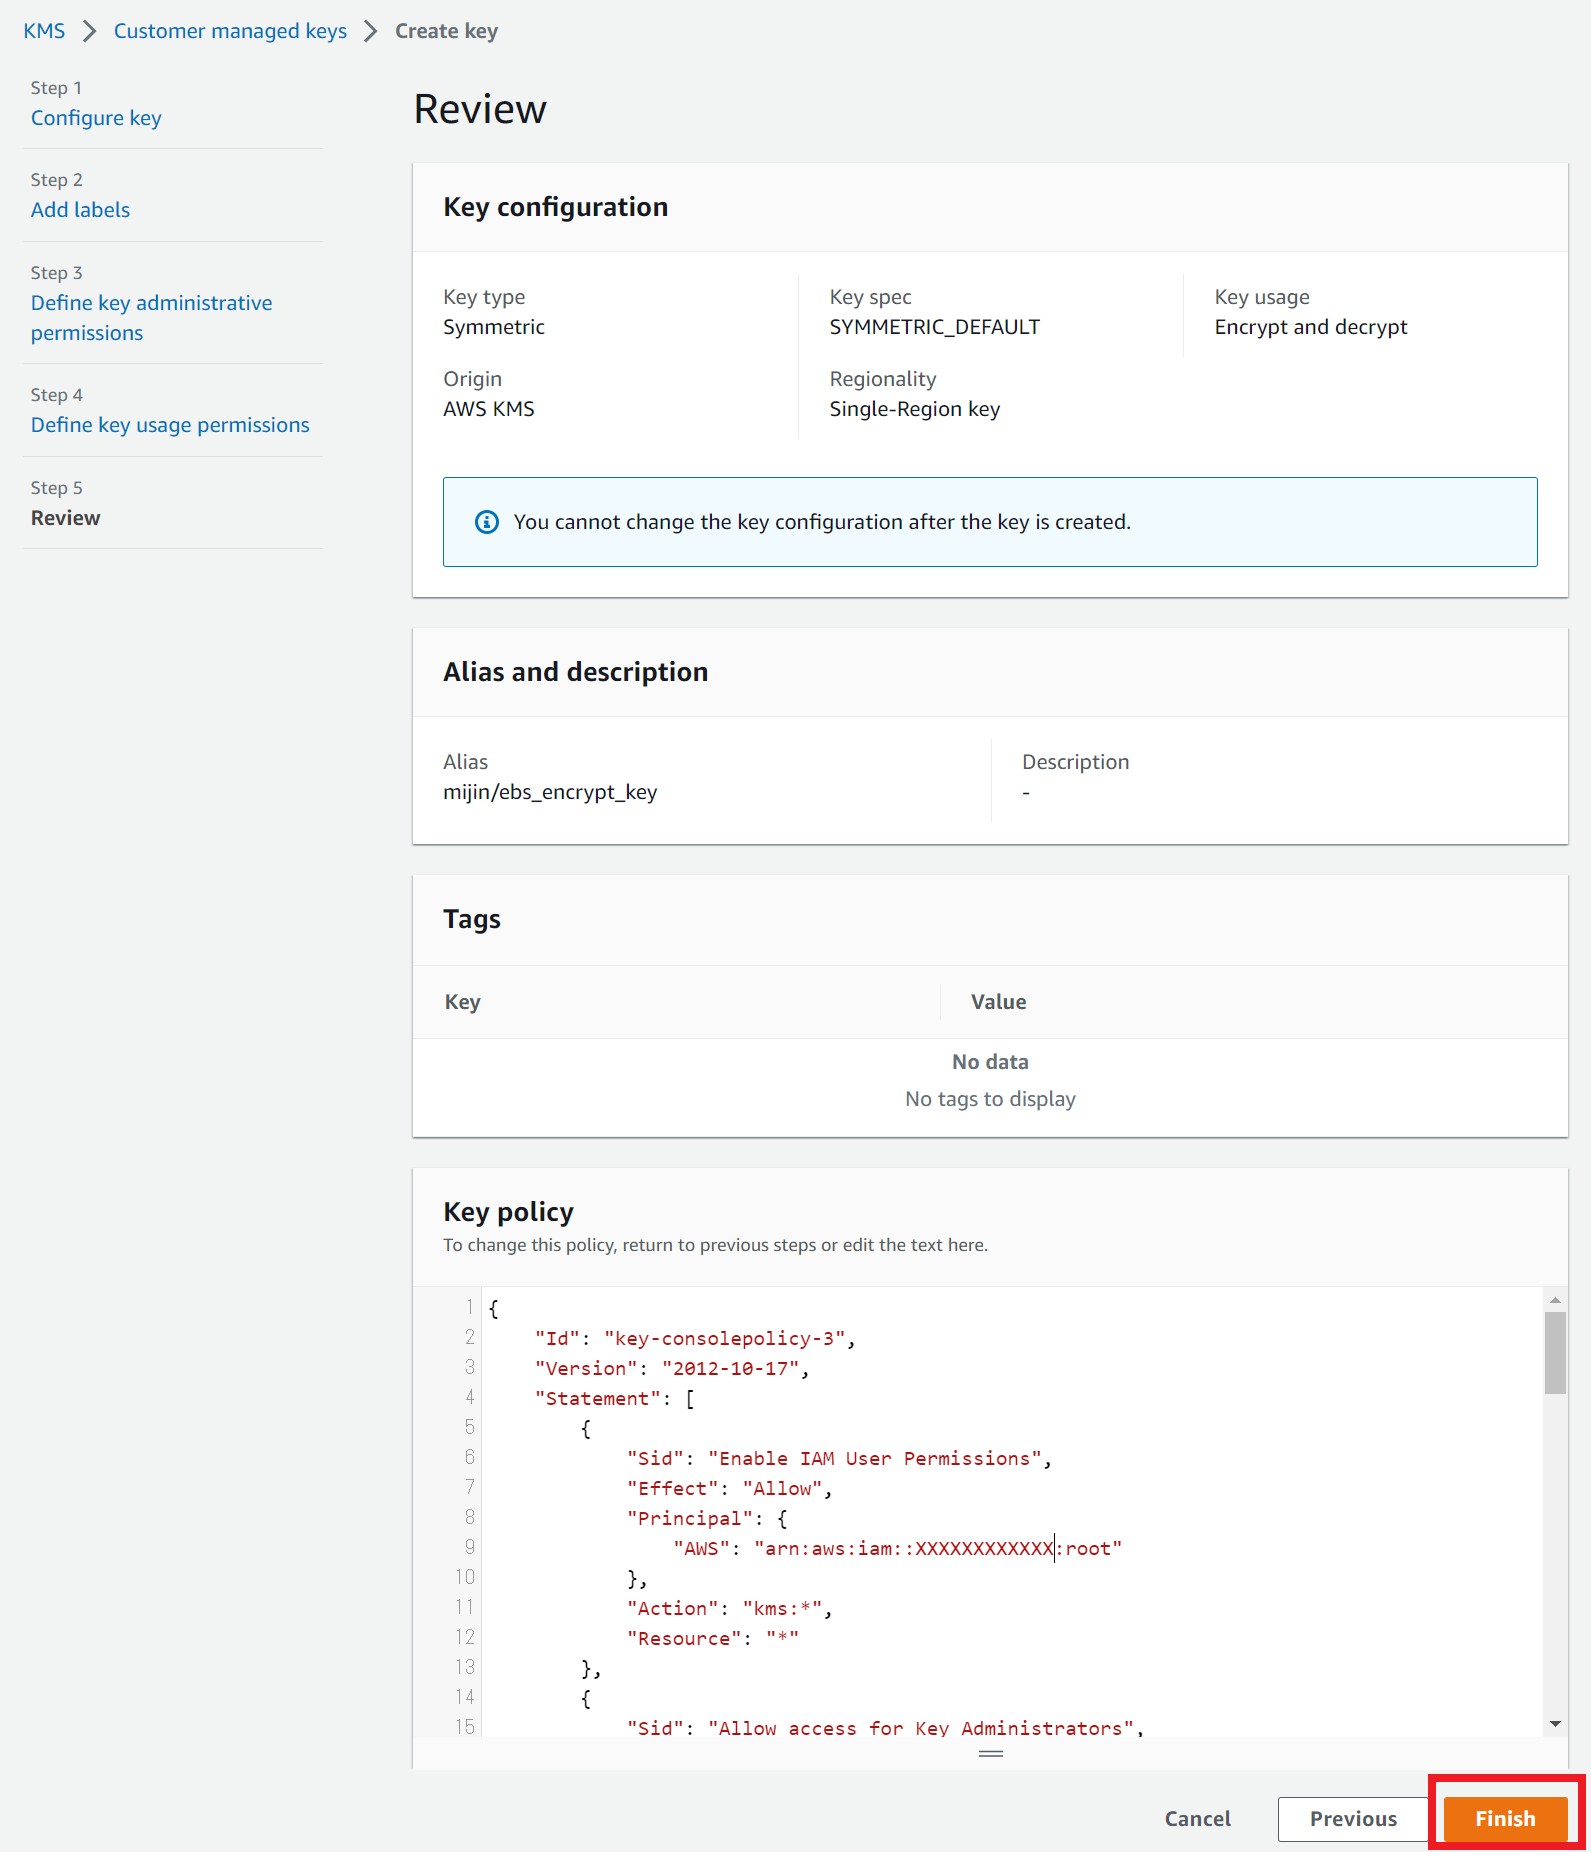
|
2.2.6.2.3. Stop one of the nodes
Log in to PEER node 3. |
. /aws_tips_ssm_login and log in to the node. |
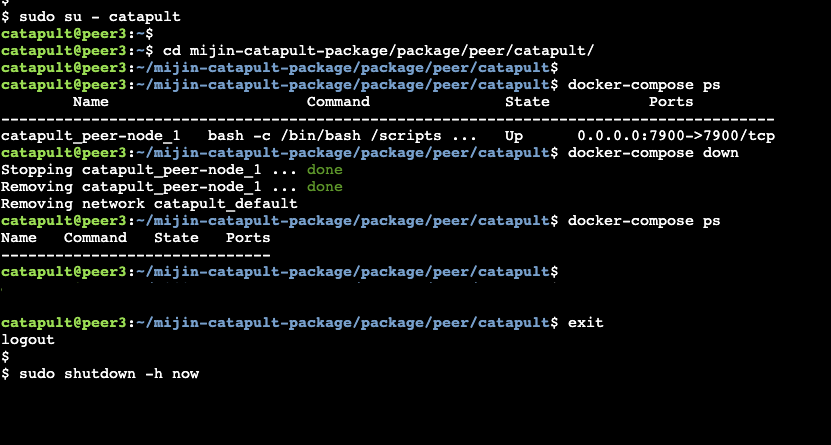
mijin Catapult(v.2) and stop the EC2 instance.
sudo su - catapult
cd mijin-catapult-package/package/peer/catapult/
docker-compose down
docker-compose ps
exit
sudo shutdown -h now
|
|
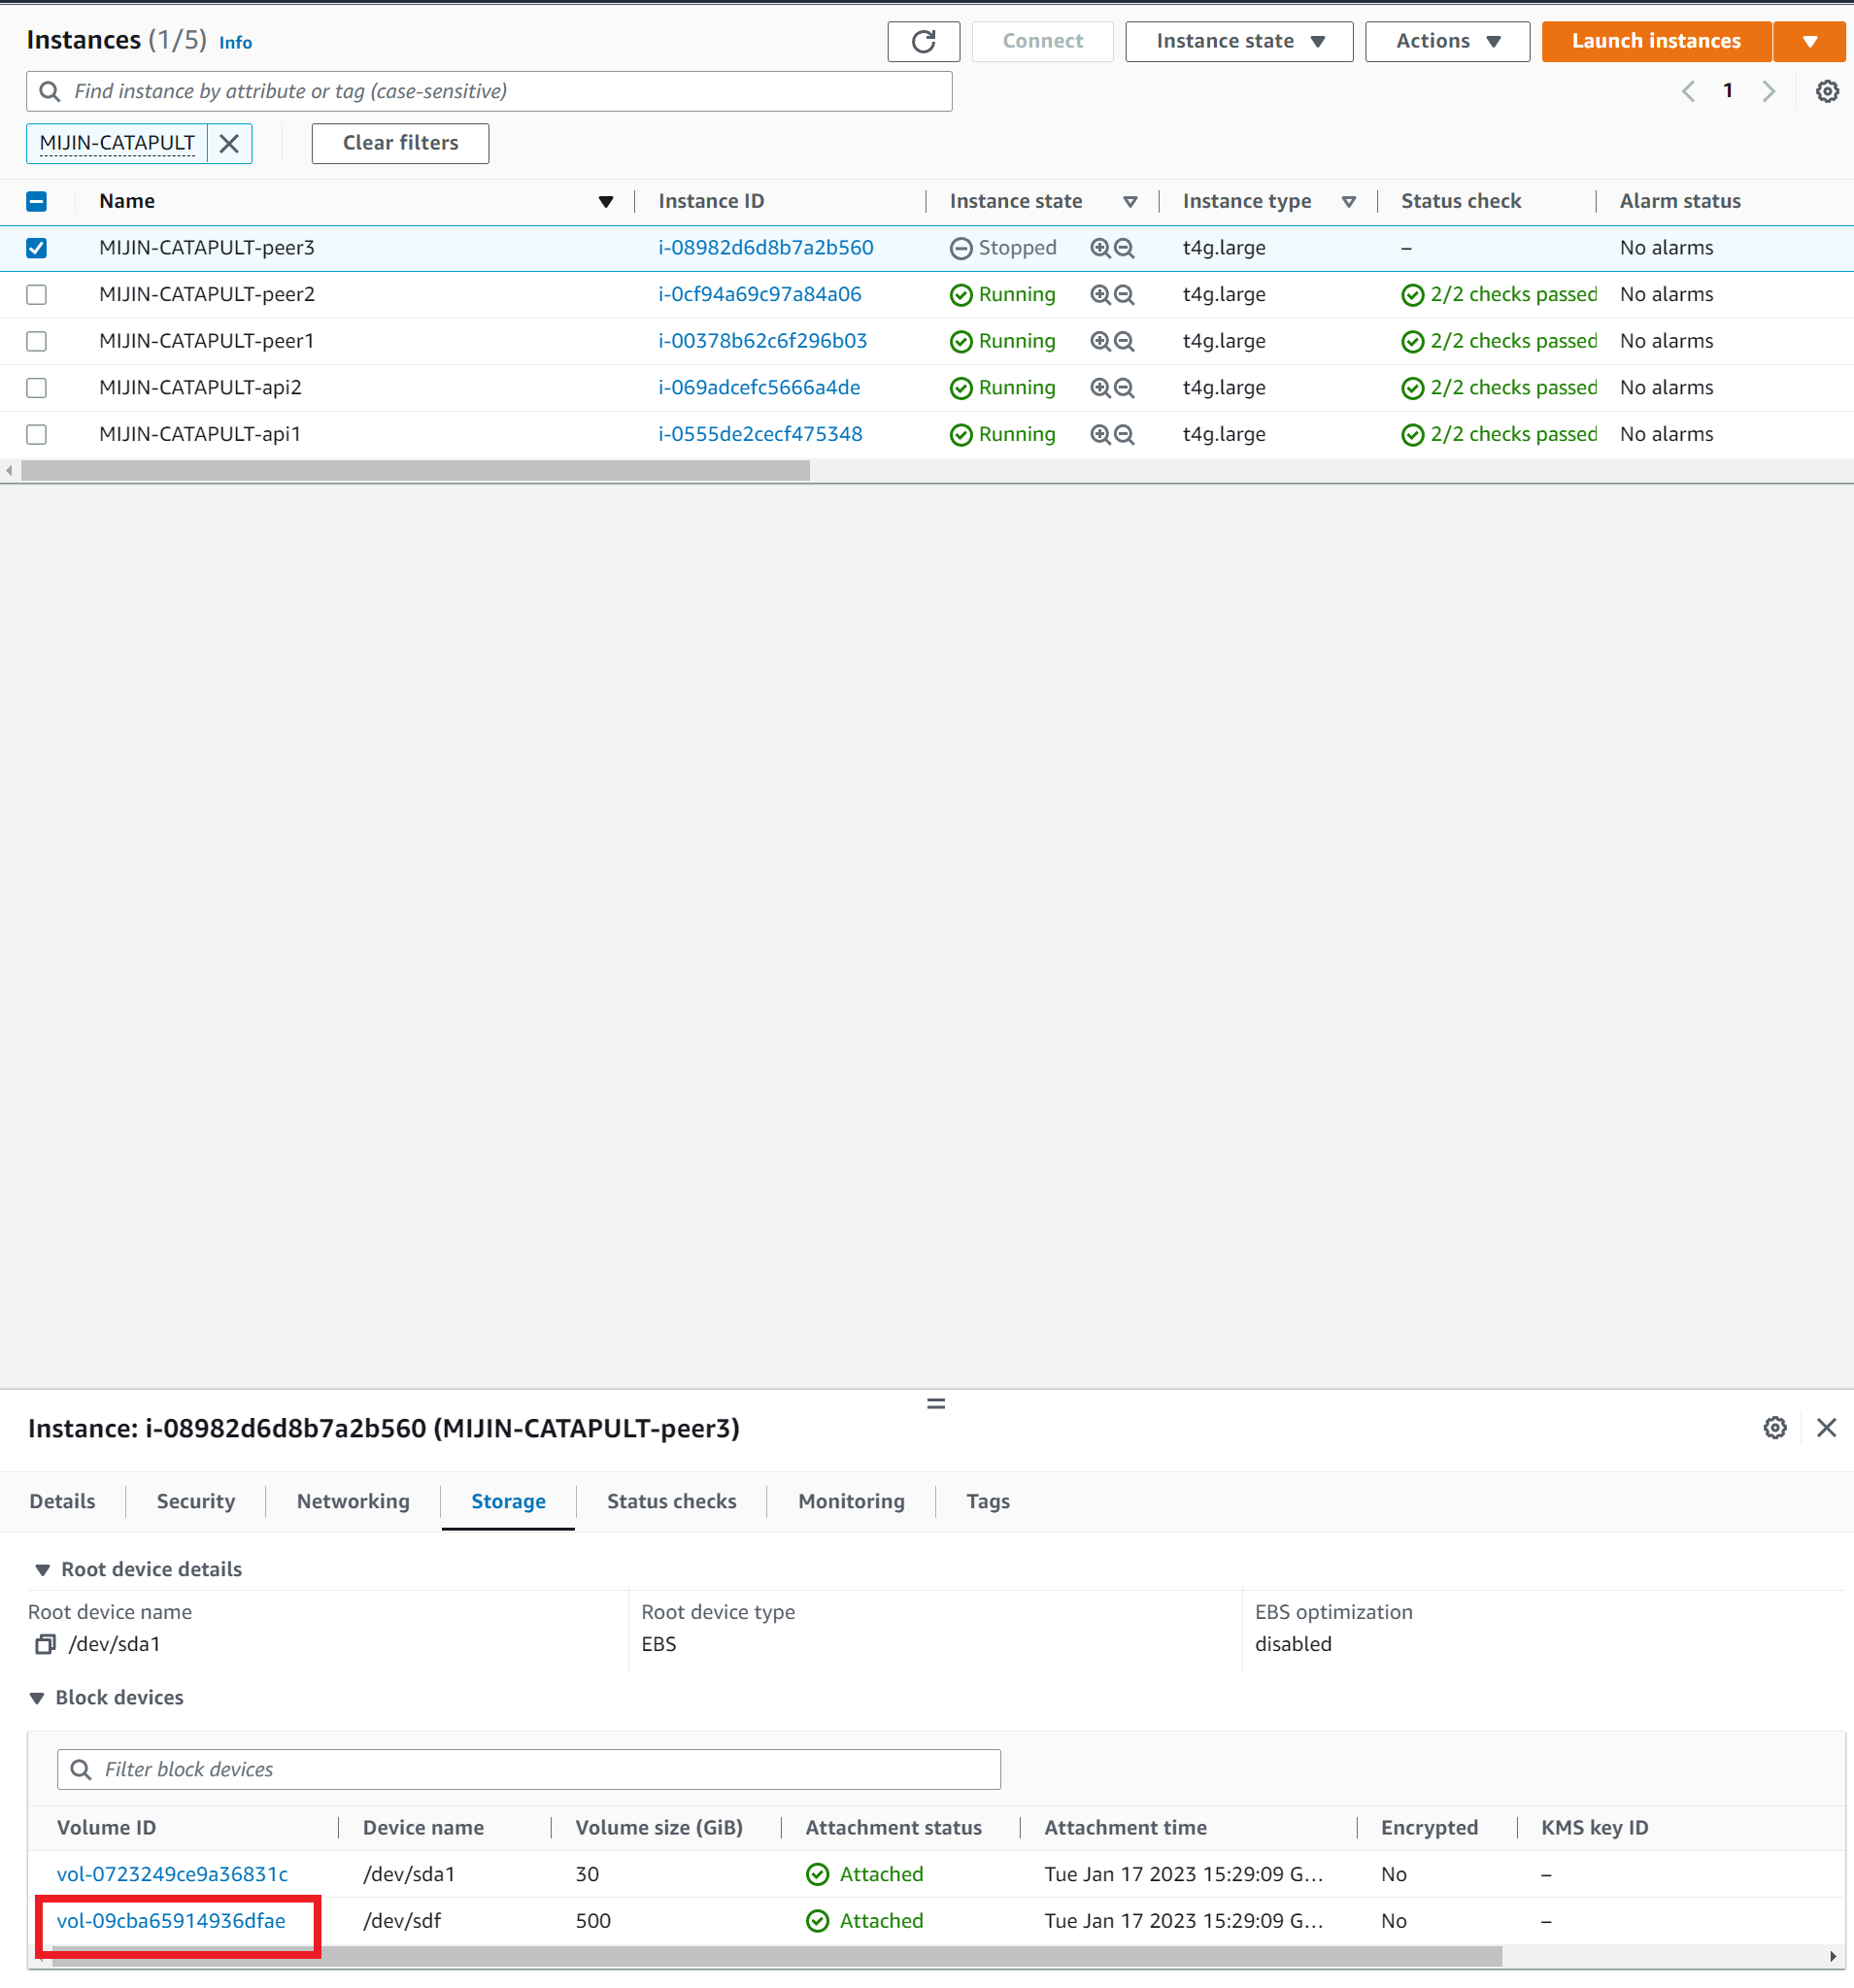
2.2.6.2.4. Obtain a snapshot of a stopped node
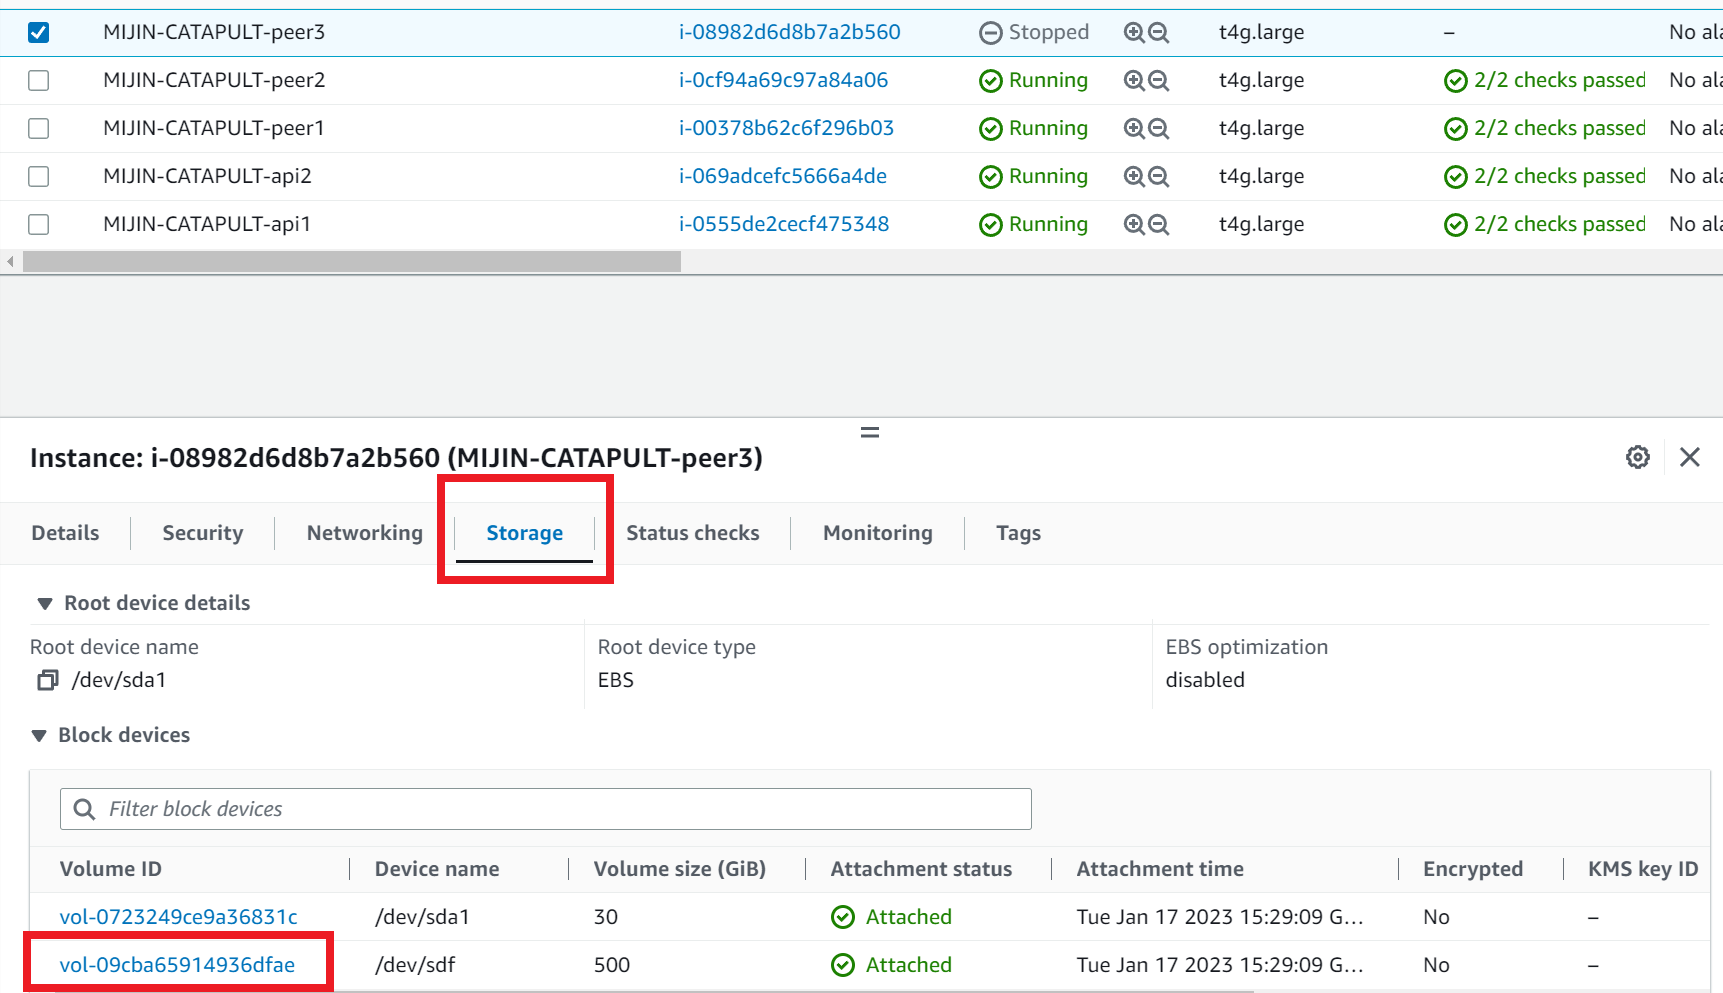
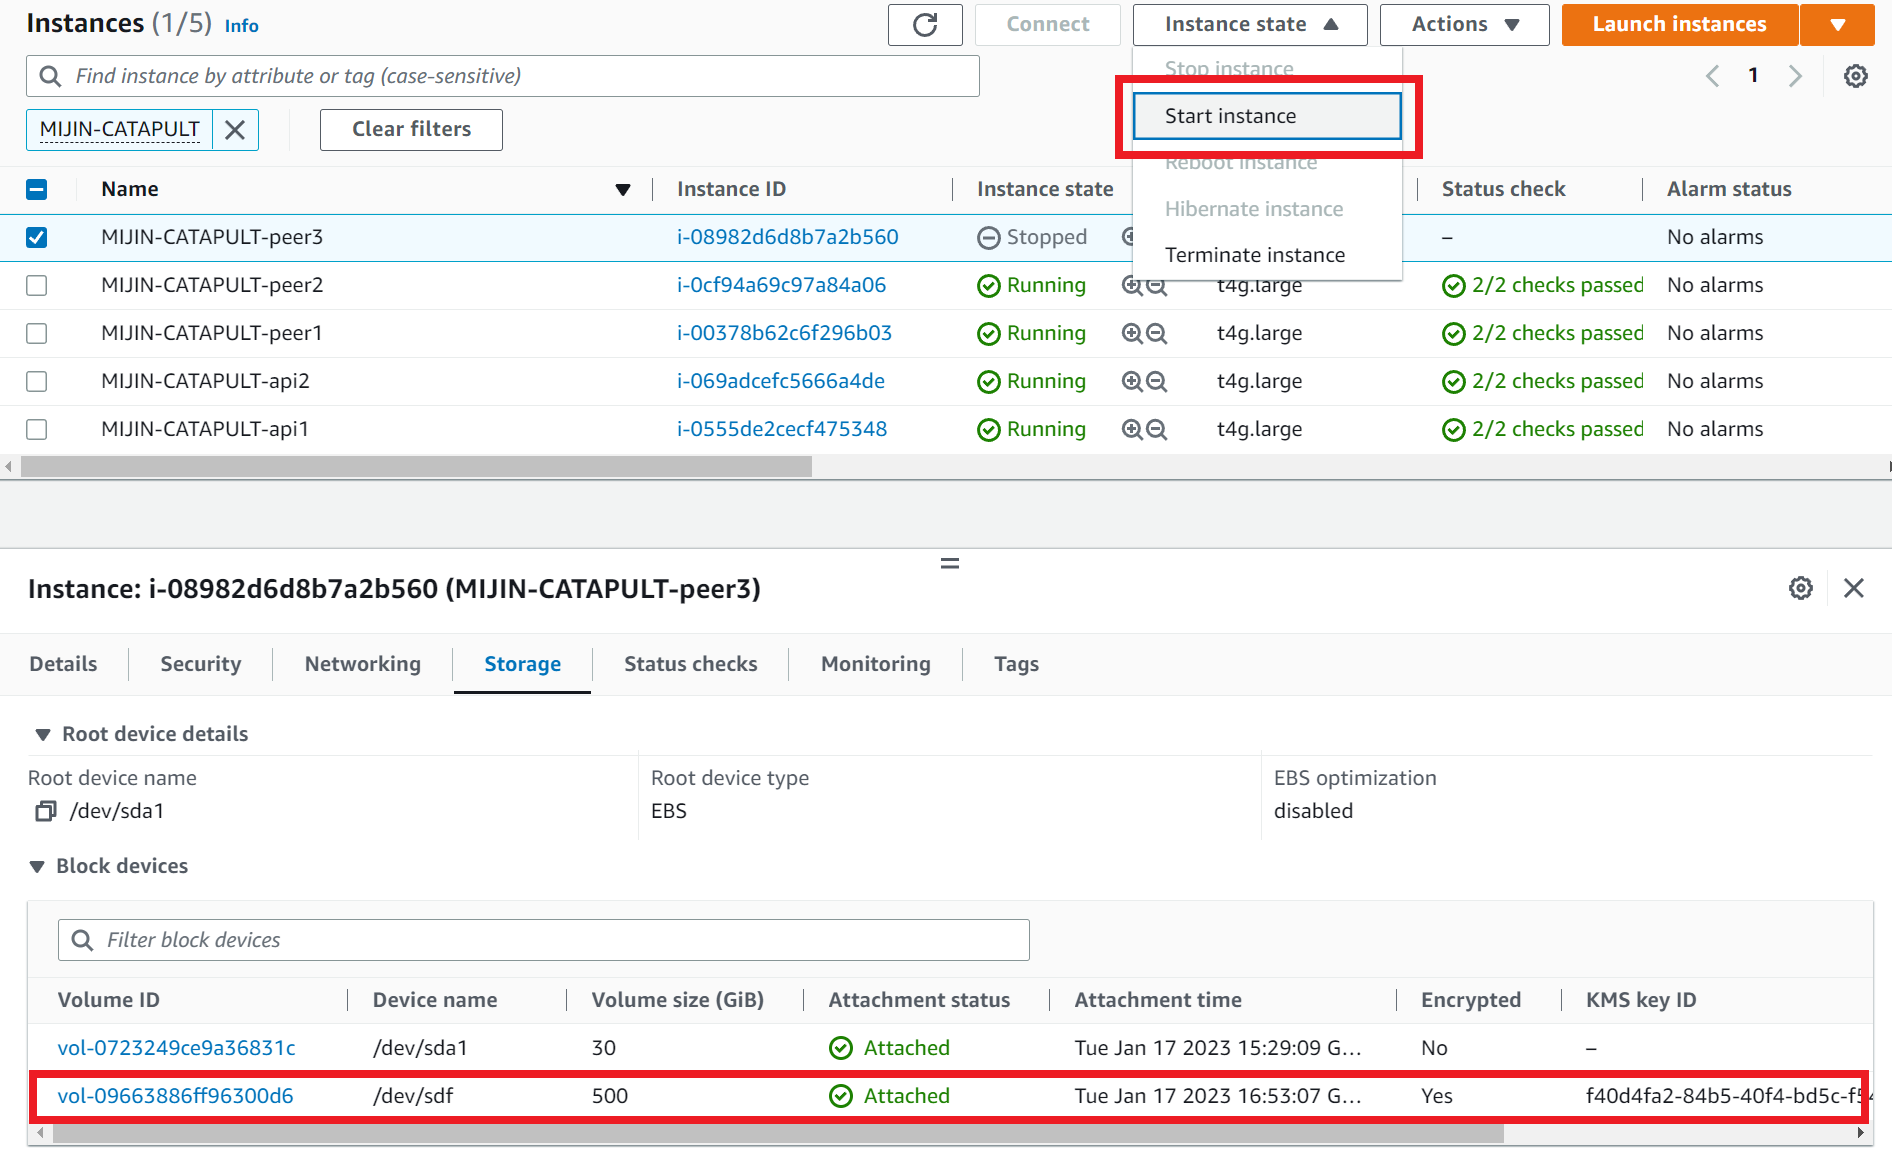
Select the stopped PEER node 3, click the Storage tab, and click the target volumeId.
Here, the volumeId and device name (/dev/sdf) should be noted.
|
|
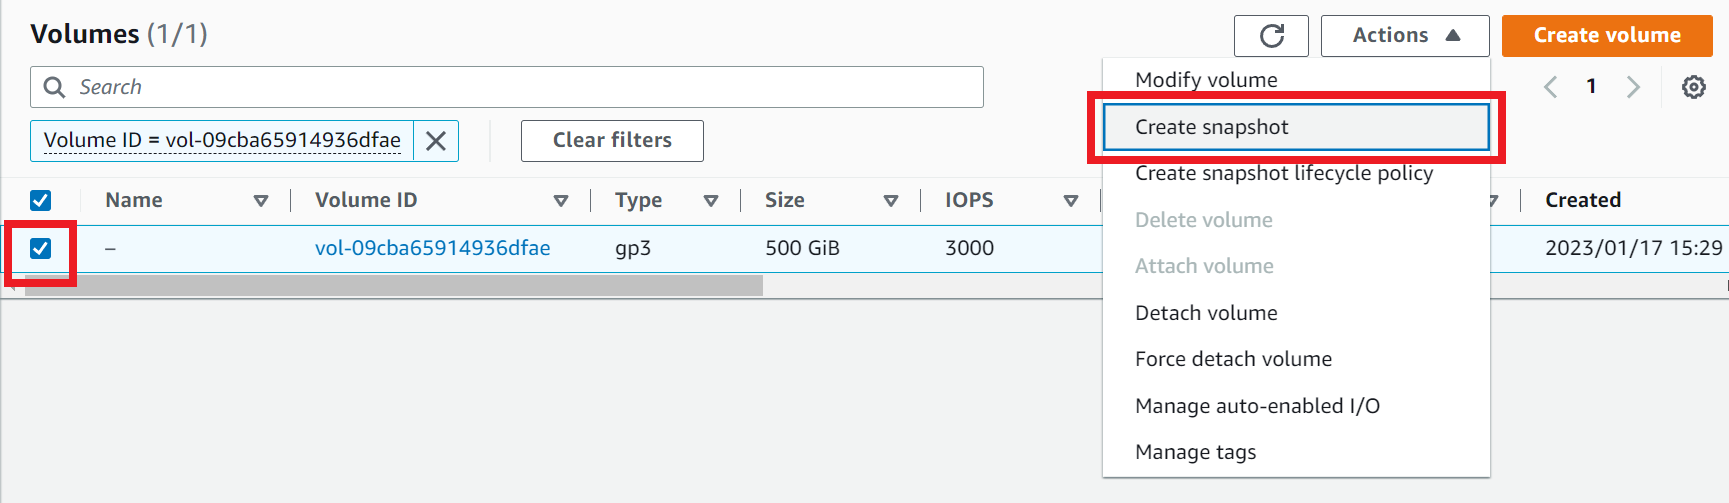
Click the check box for the target volume and click ‘Create snapshot’. |
|
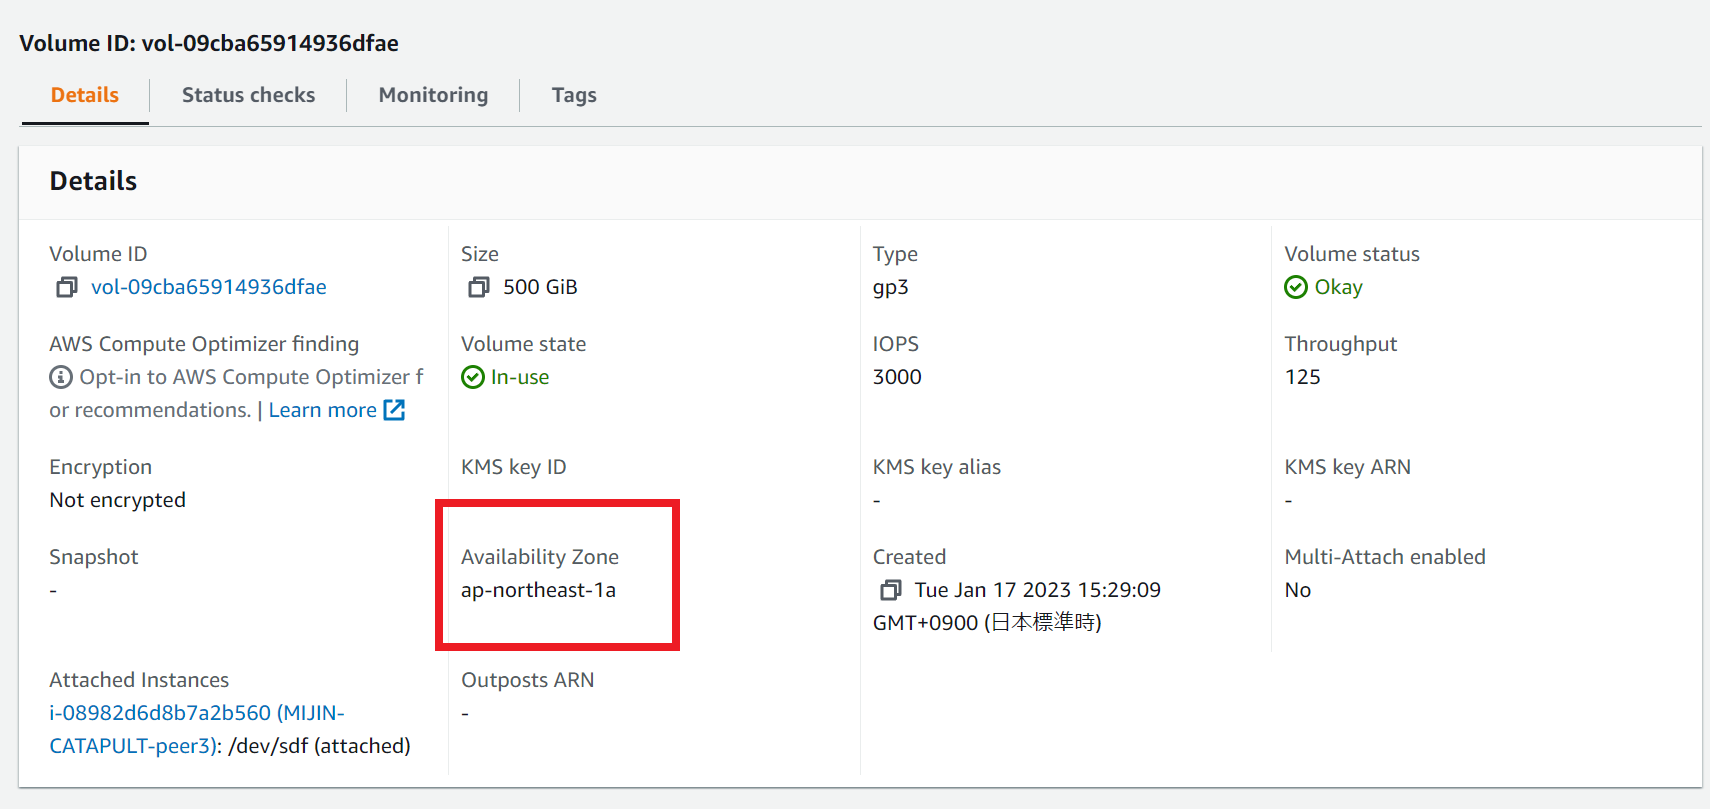
We will now check which availability zone this volume belongs to. |
|
Provide a name in the description that is easy to understand when searching, and click ‘Create snapshot’. |

|
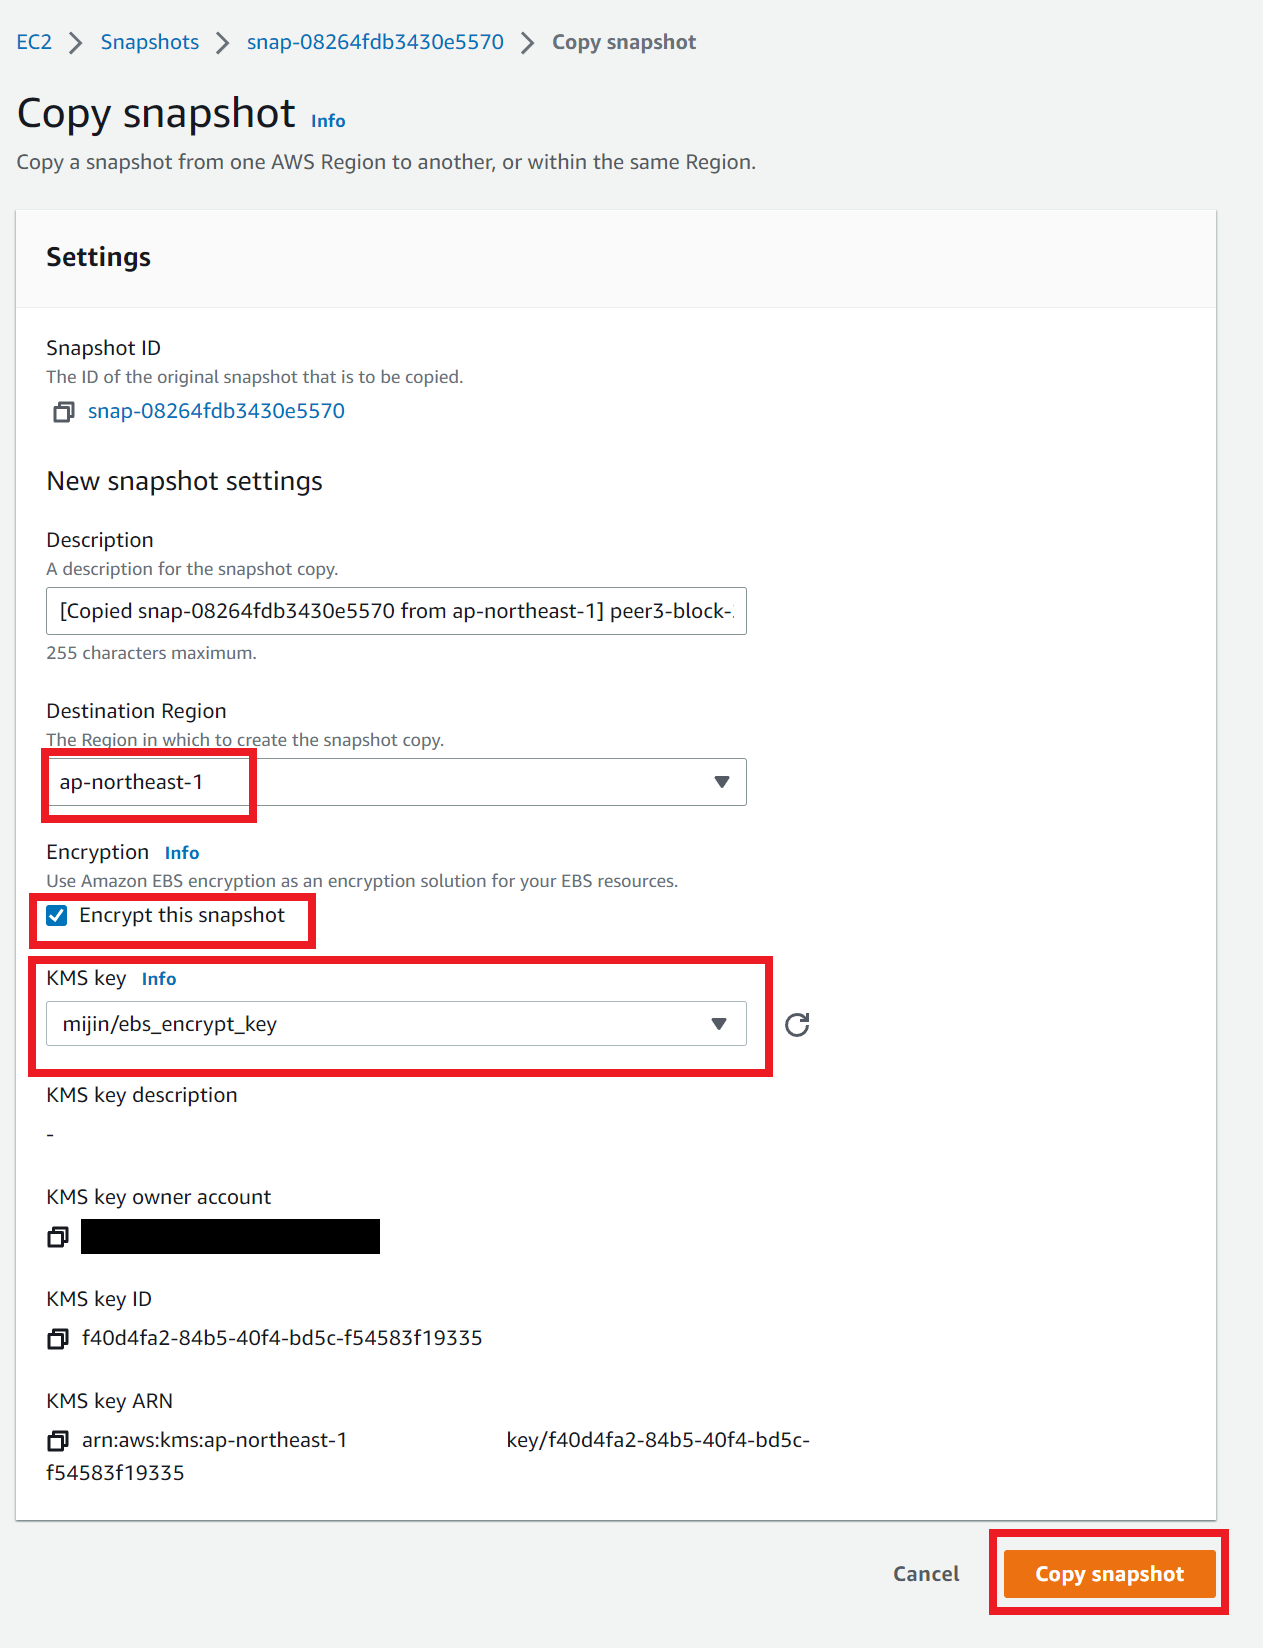
2.2.6.2.5. Create an encrypted snapshot by copying the created snapshot
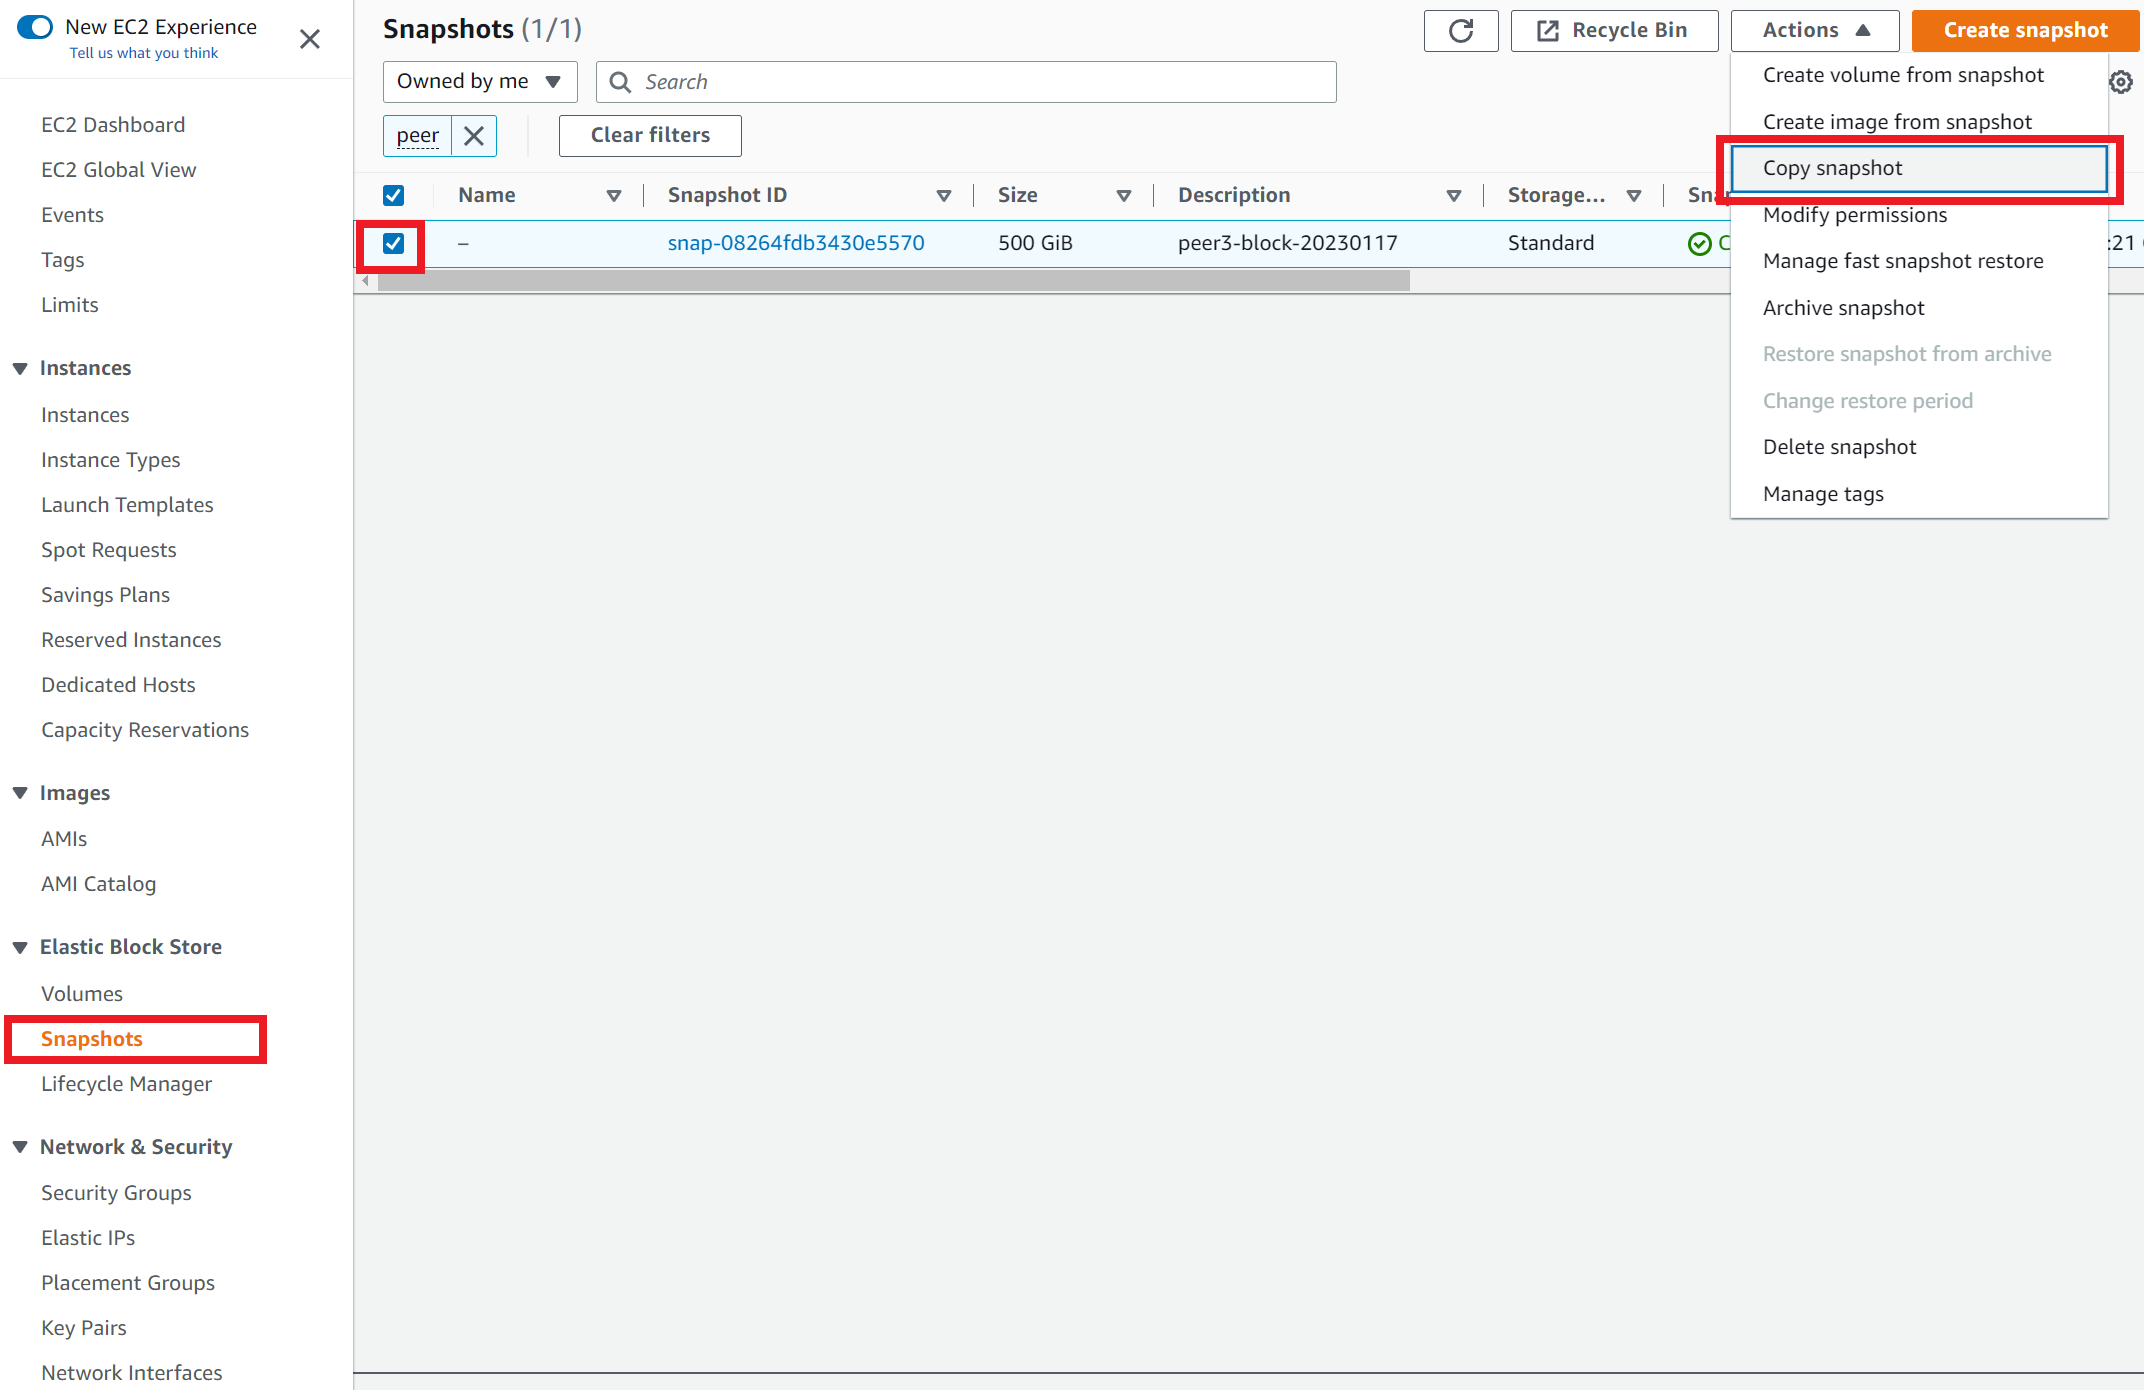
Click Snapshot in the menu, check the snapshot you created, and click ‘Copy snapshot’.
|
|
For the destination region, select the same region as the node from which the snapshot was taken.
Check the ‘Encrypt this snapshot’ and specify the KMS created.
Click on ‘Copy Snapshot.’
|
|
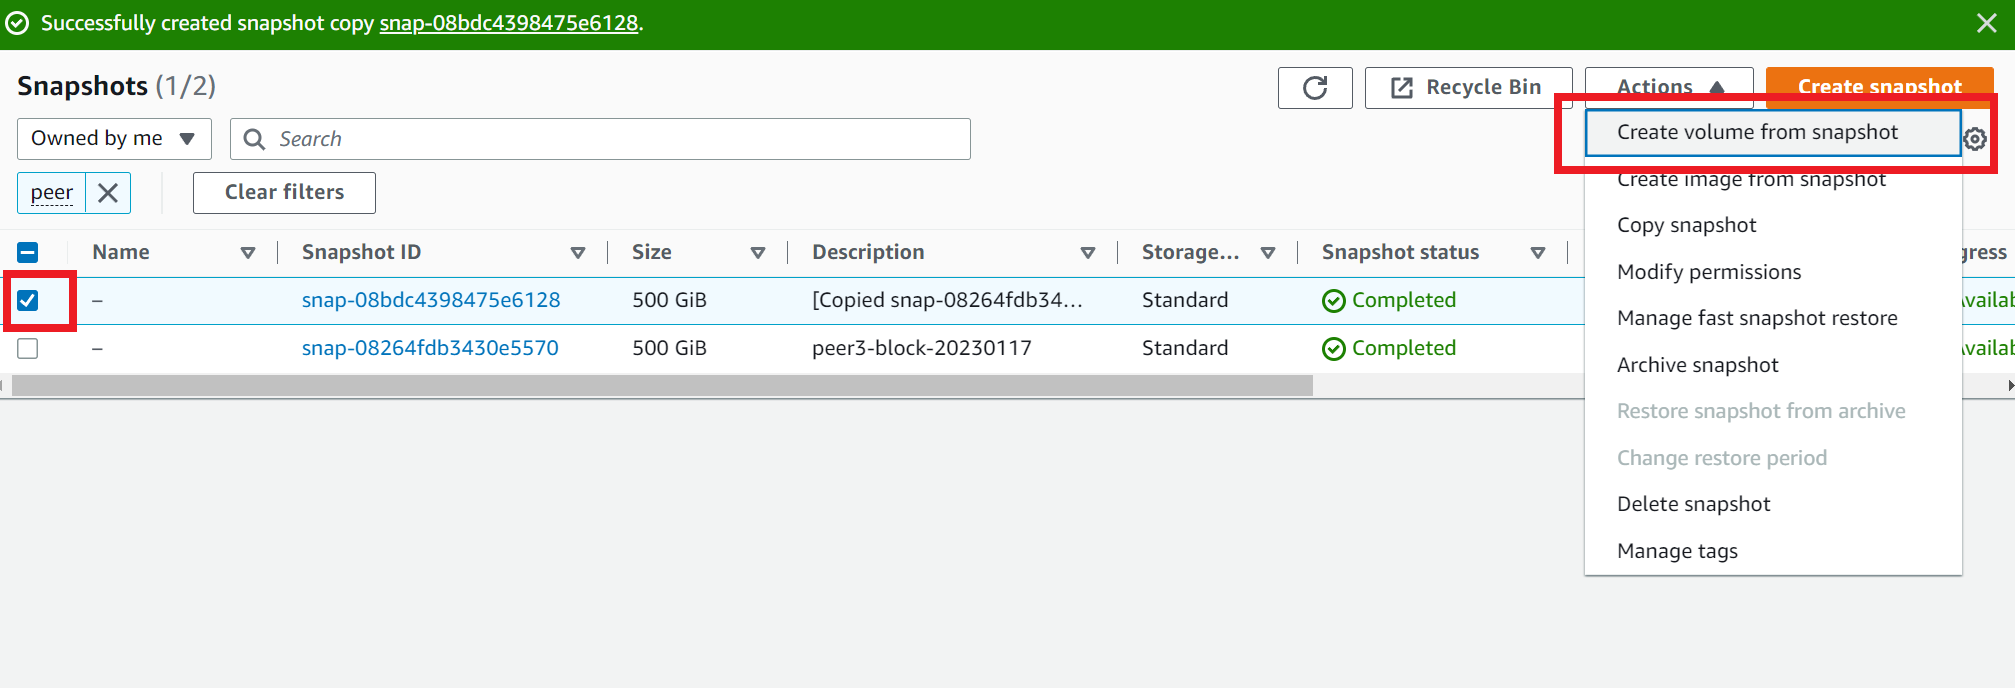
Make sure the snapshot has been completed.
|

|
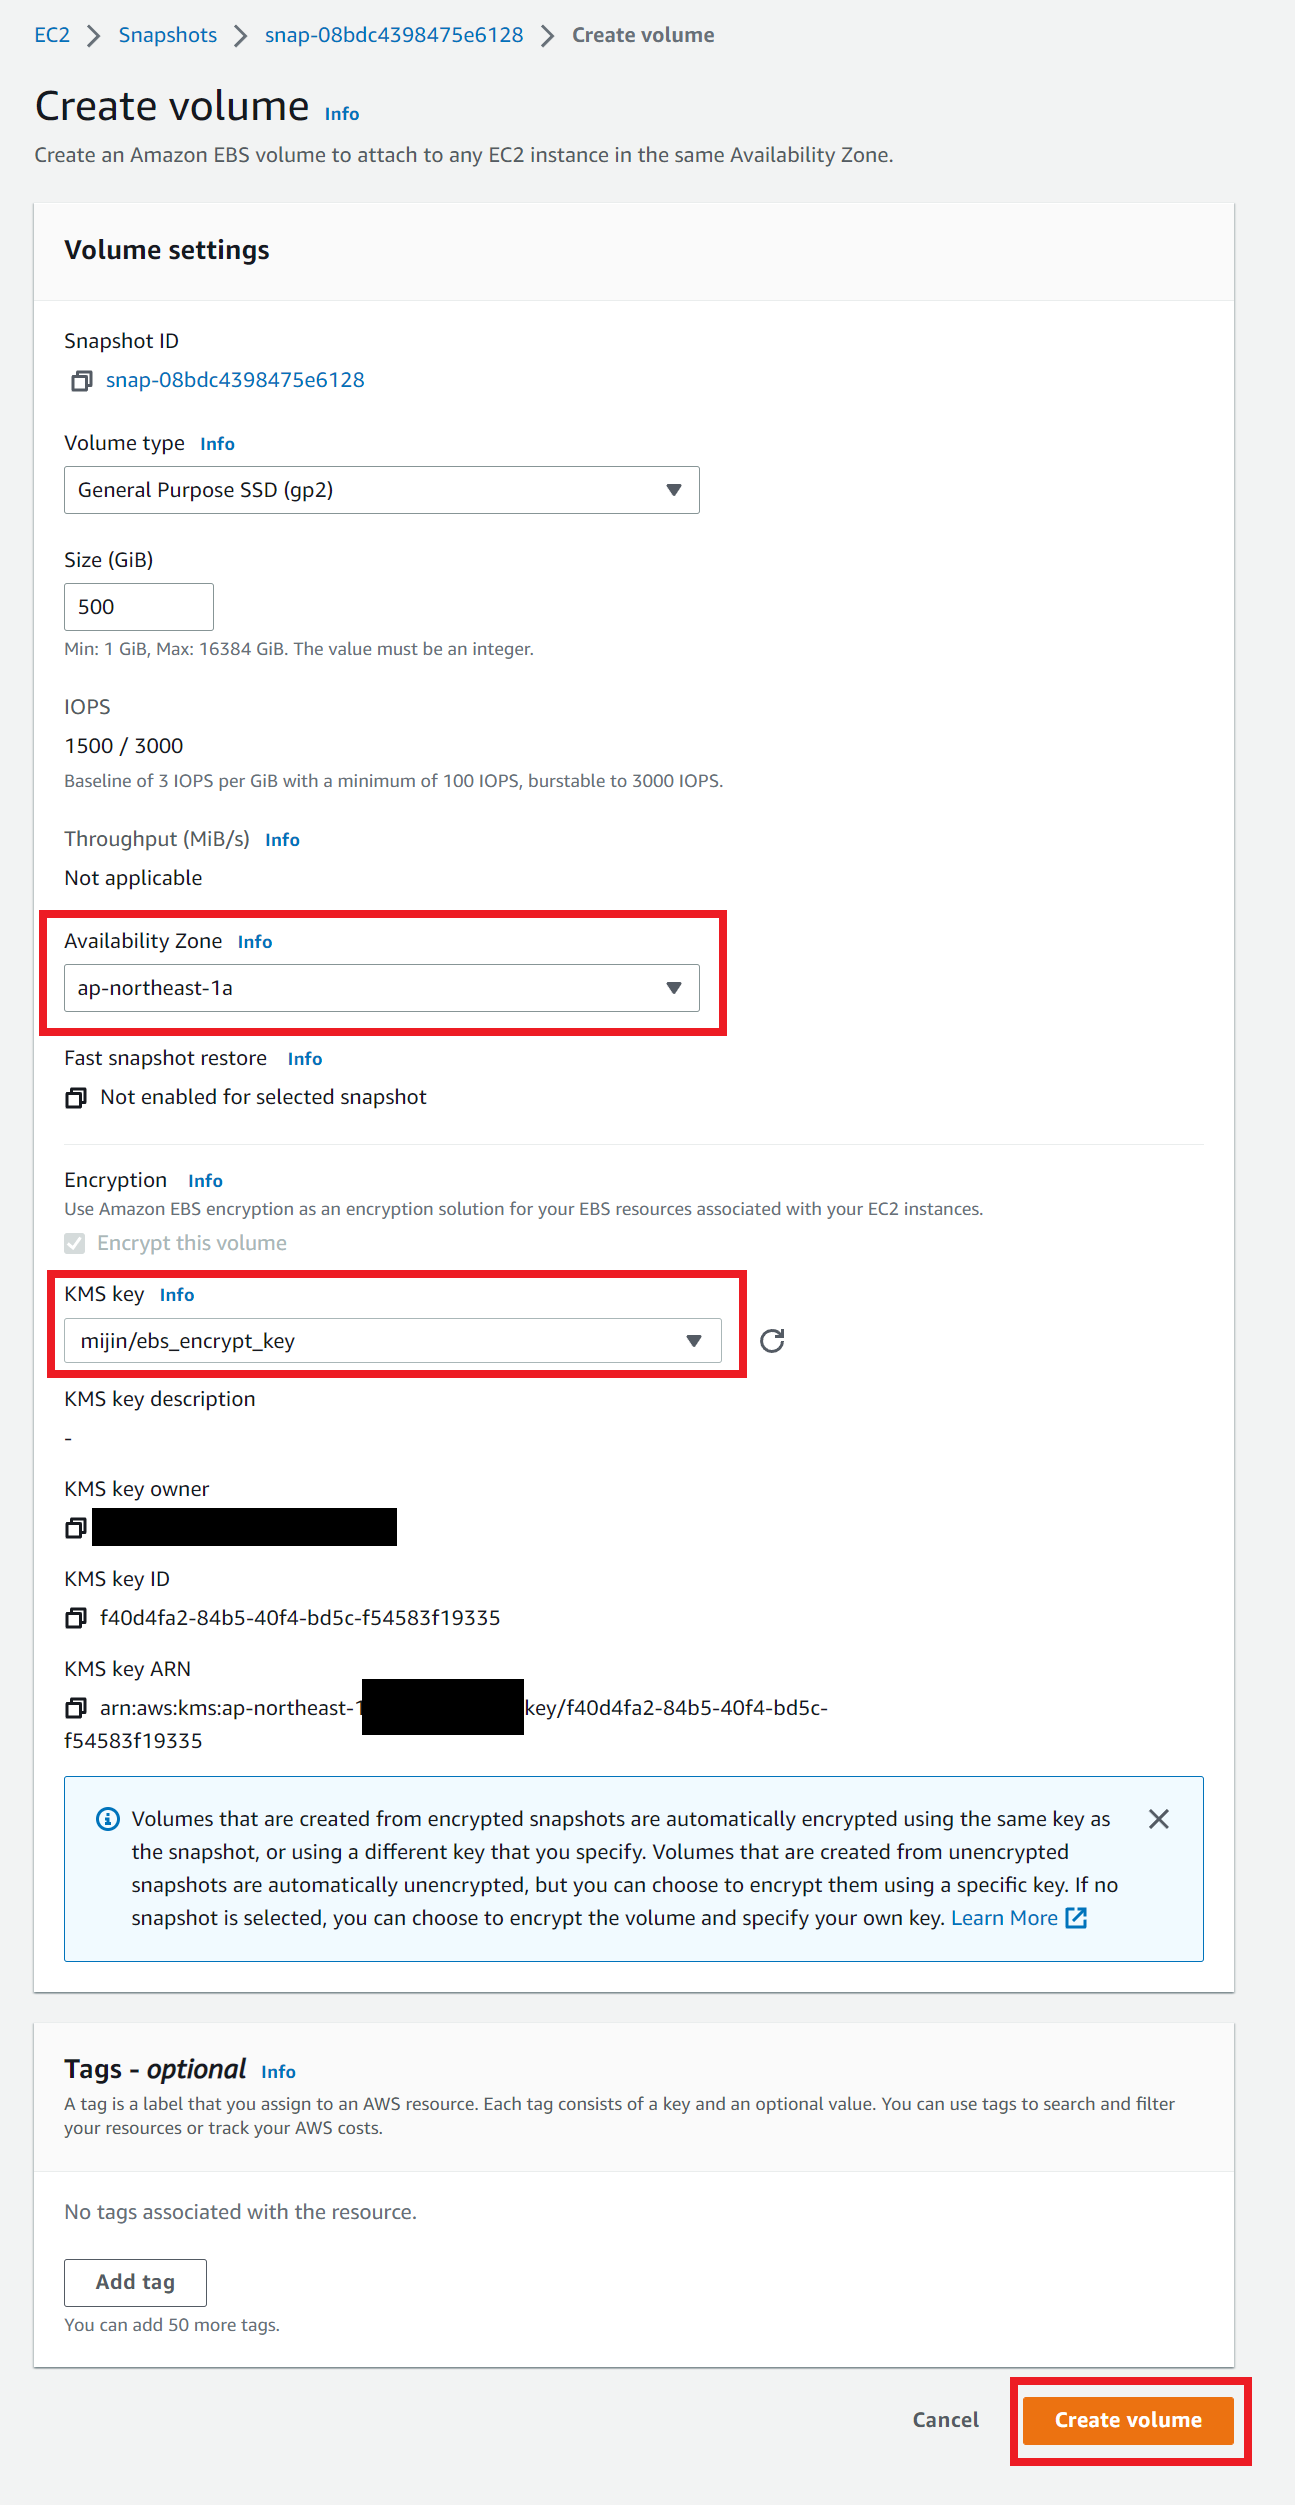
2.2.6.2.6. Create a volume from an encrypted snapshot
Click on the encrypted snapshot and click ‘Create volume from snapshot’.
|
|
Select the availability zone as the same availability zone as the node from which the snapshot was taken.
Select the KMS key you created.
Click on ‘Create volume.’
|
|
Note
2.2.6.2.7. Detach the volume of blockchain data on the stopped PEER node
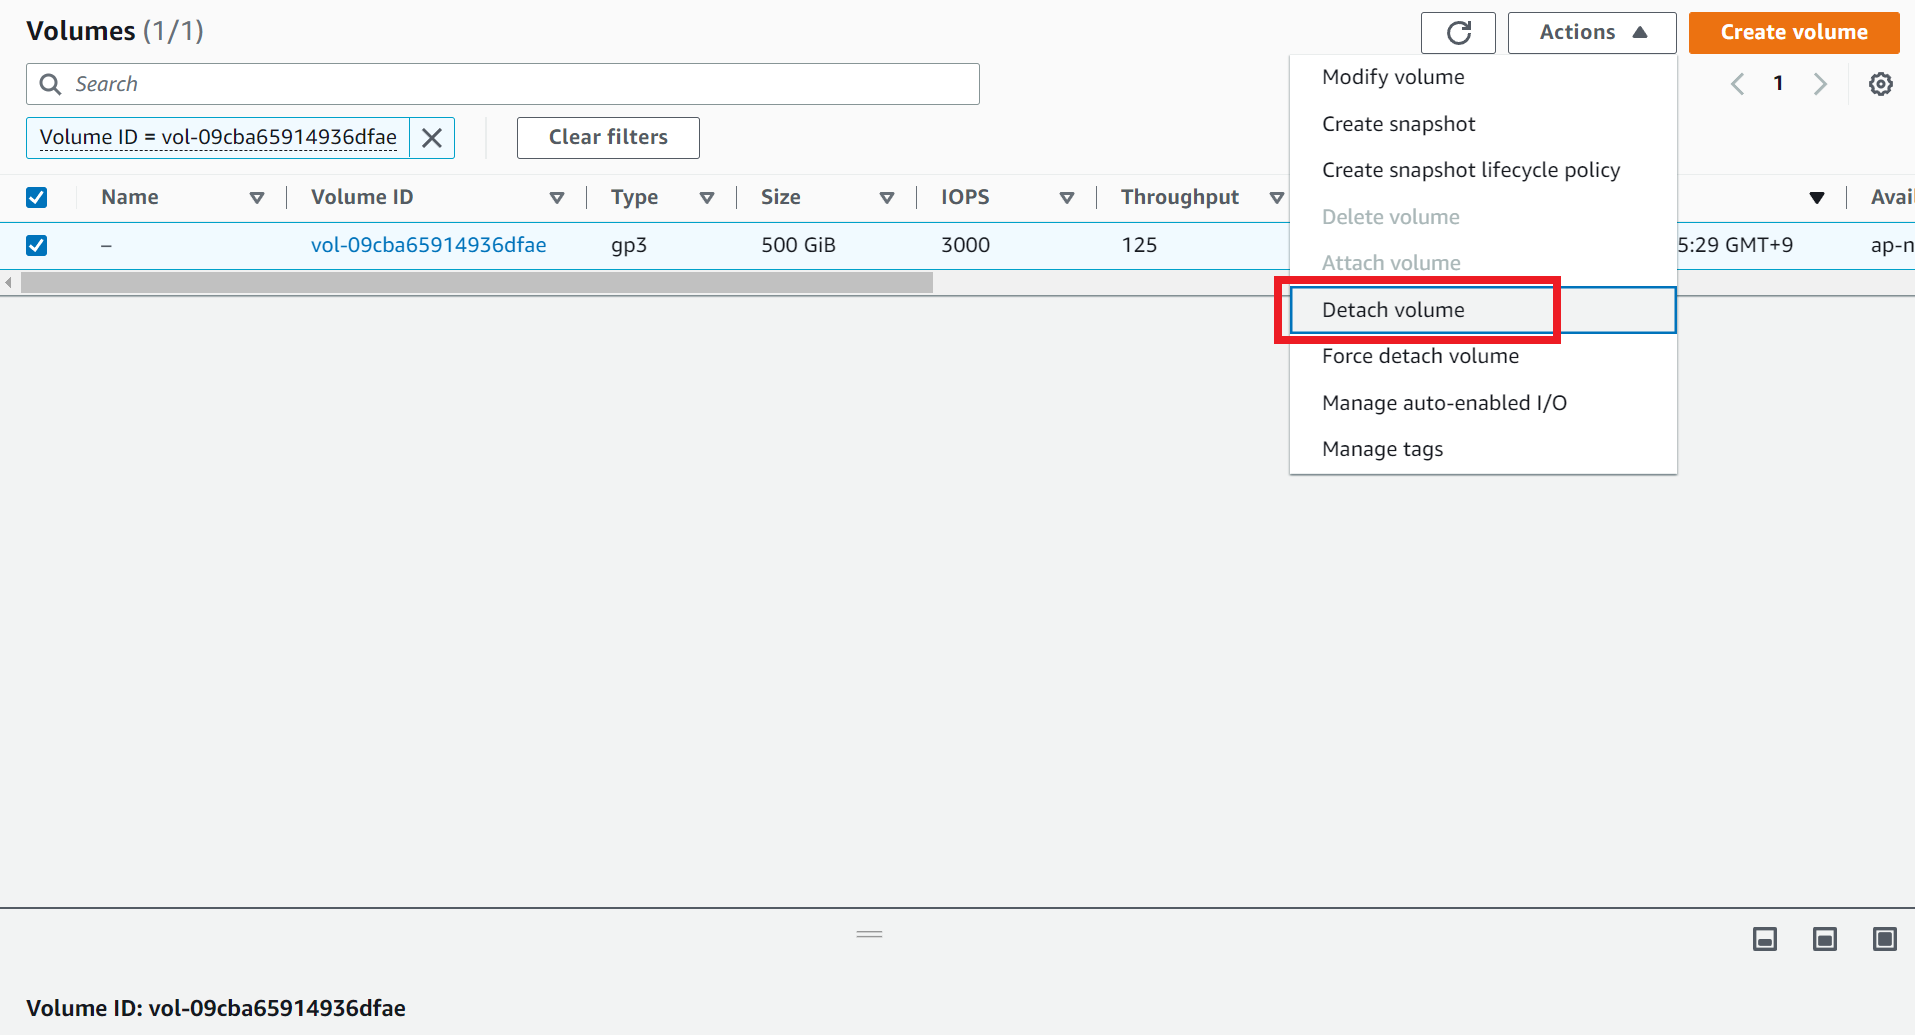
Select the volume from PEER node 3 again.
|
|
From Volume, click on ‘Detach volume’ and press OK on the screen that pops up.
|
|
2.2.6.2.8. Attach encrypted volume to PEER node
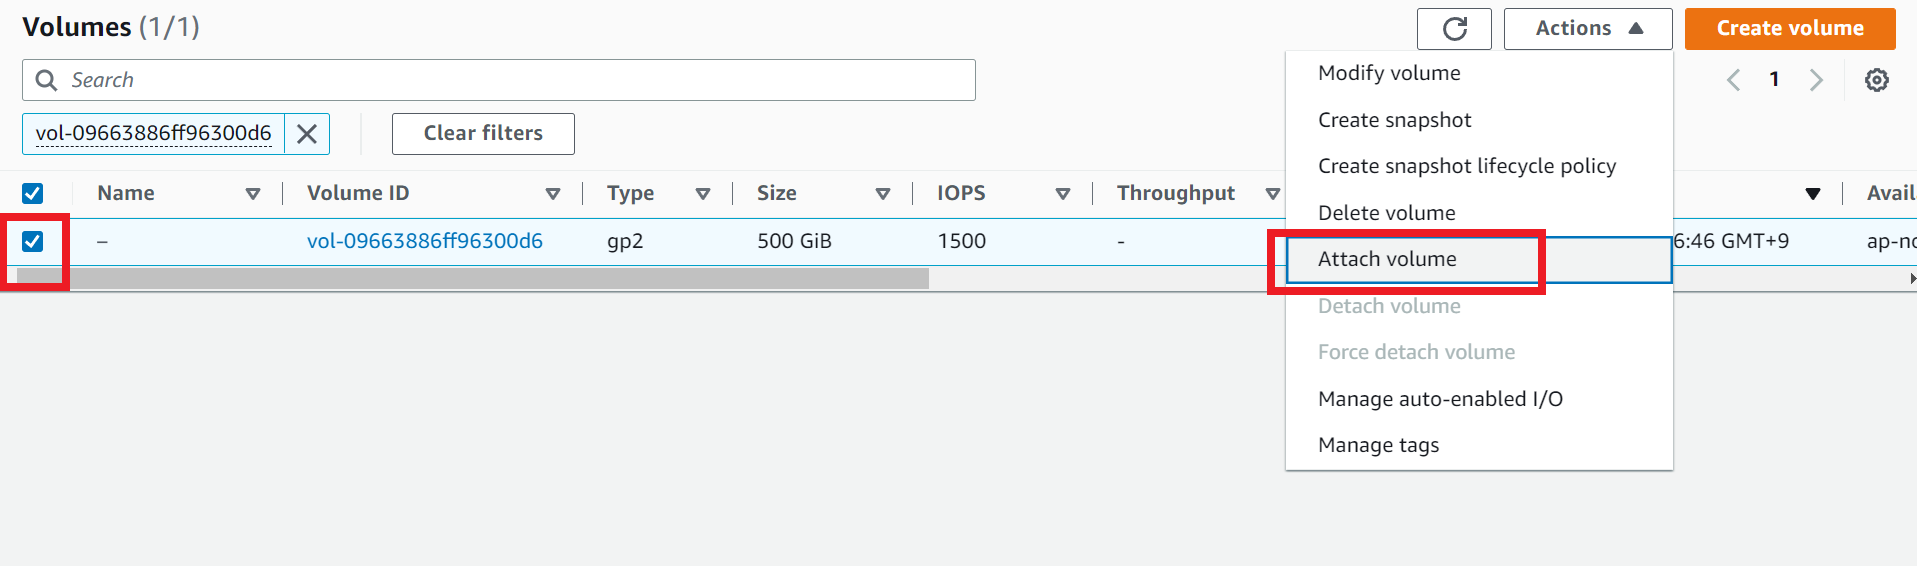
Select the encrypted volume and click ‘Attach volume’.
|
|
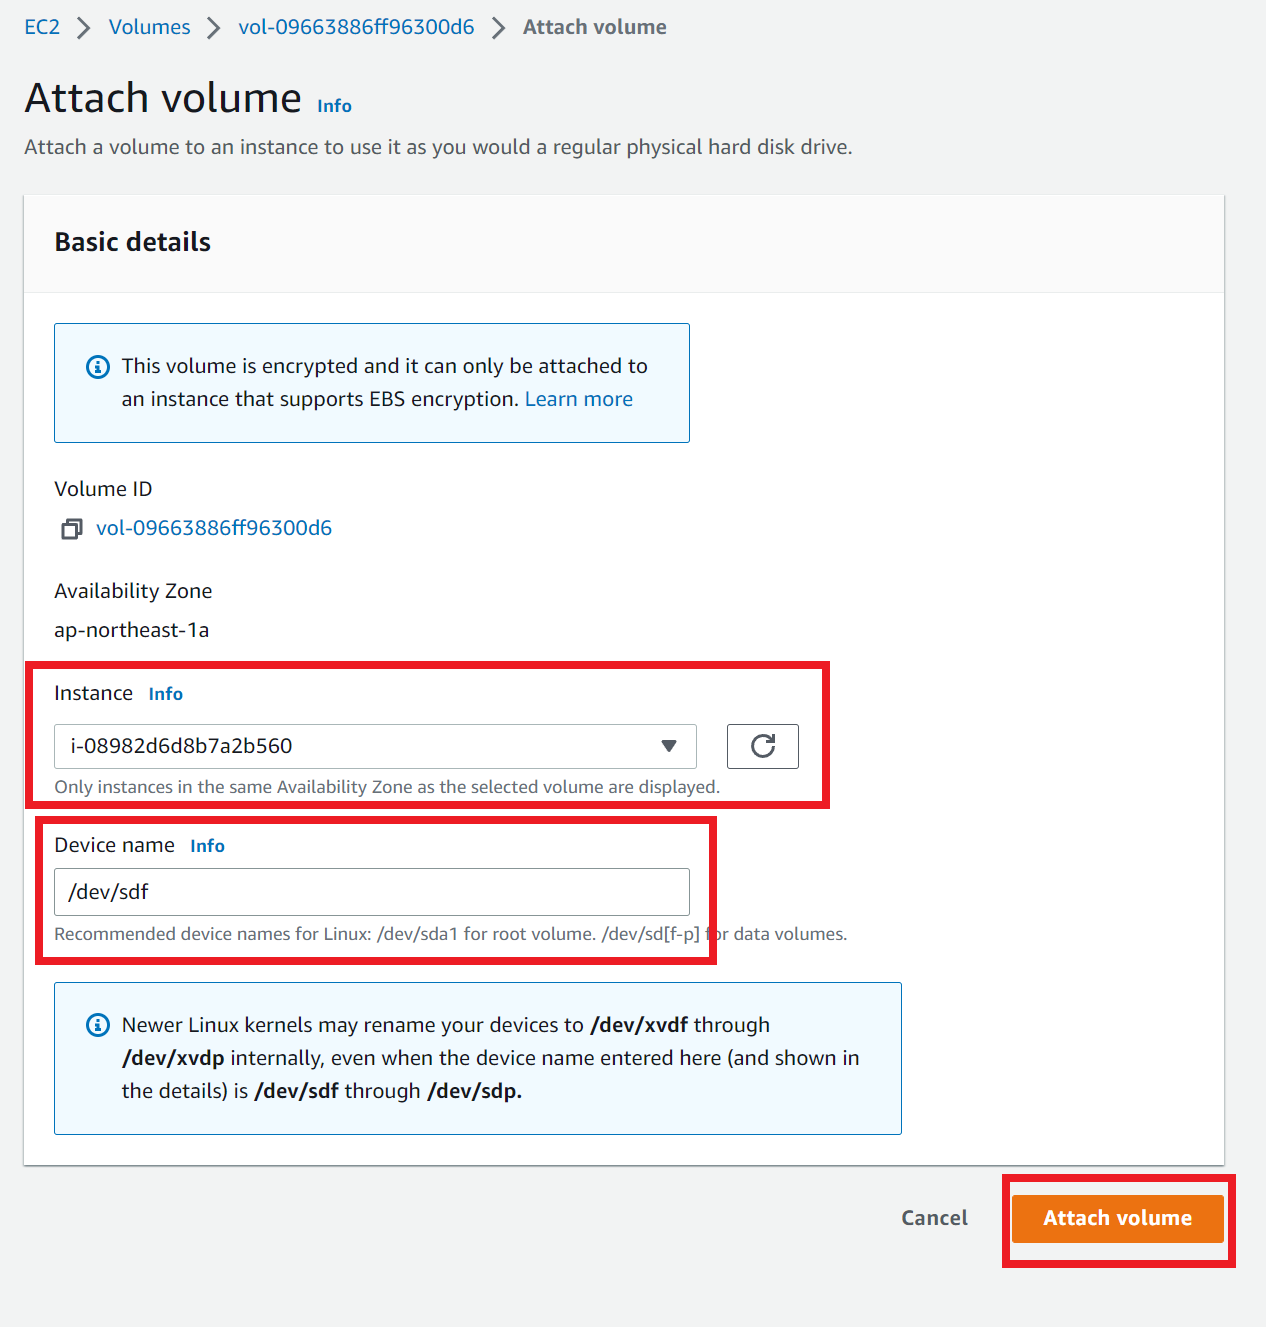
Select instance as PEER node 3 and specify the device name you have noted down as the same path as the volume before encryption.
Click on ‘Attach volume.’
|
|
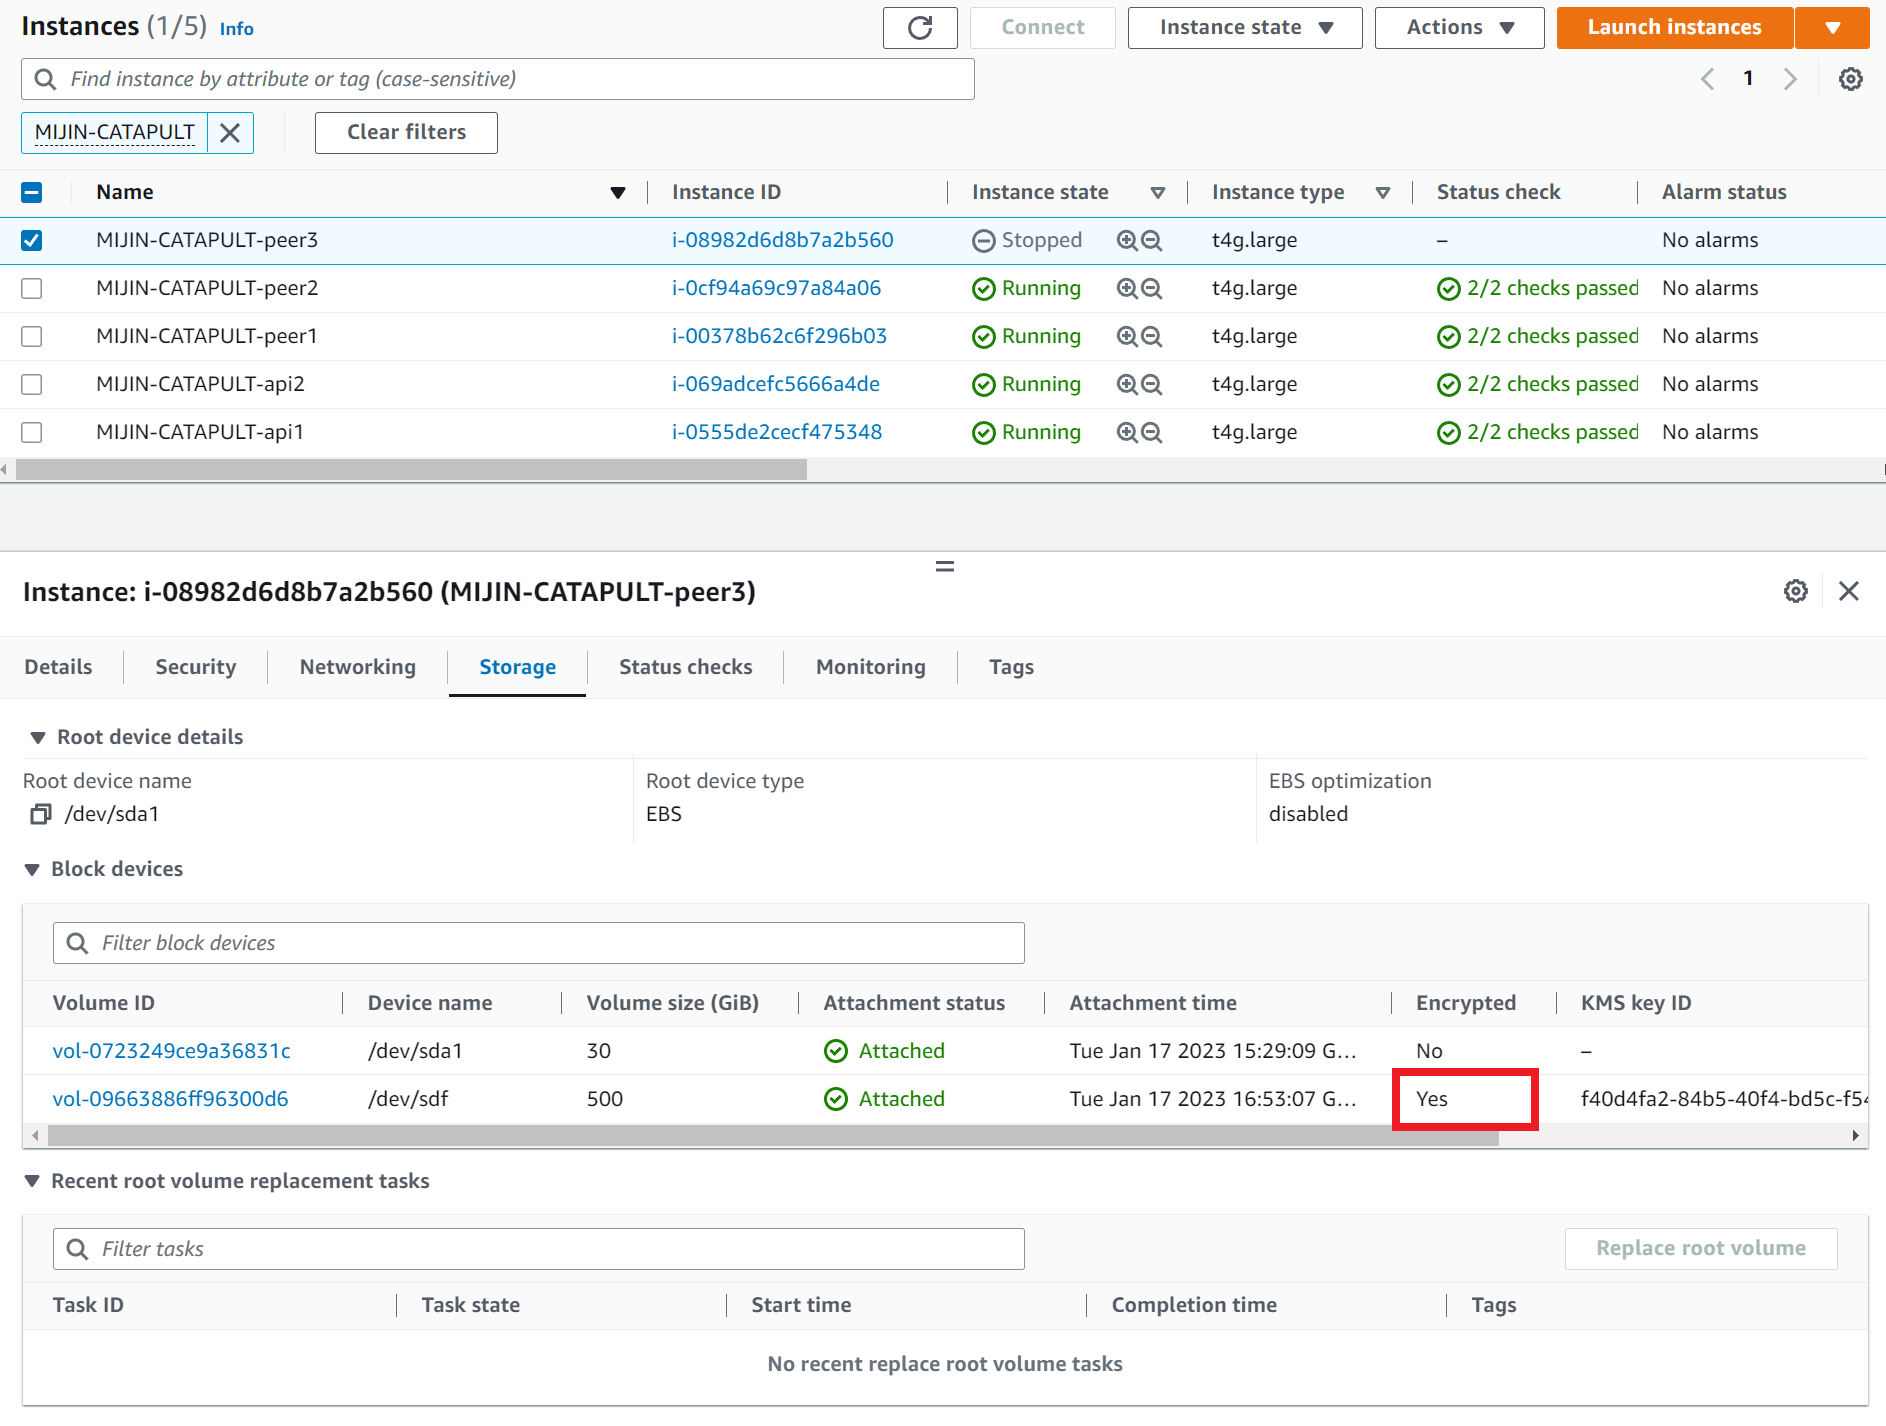
Verify that the encrypted volume is attached.
|
|
Note
The device name must be the name of the device noted in Obtain a snapshot of a stopped node.
2.2.6.2.9. Start up a stopped PEER node
From the list of instances, check PEER node 3 and click ‘Start Instance’.
|
|
Log in to PEER node 3. |
. /aws_tips_ssm_login and log in to the node. |
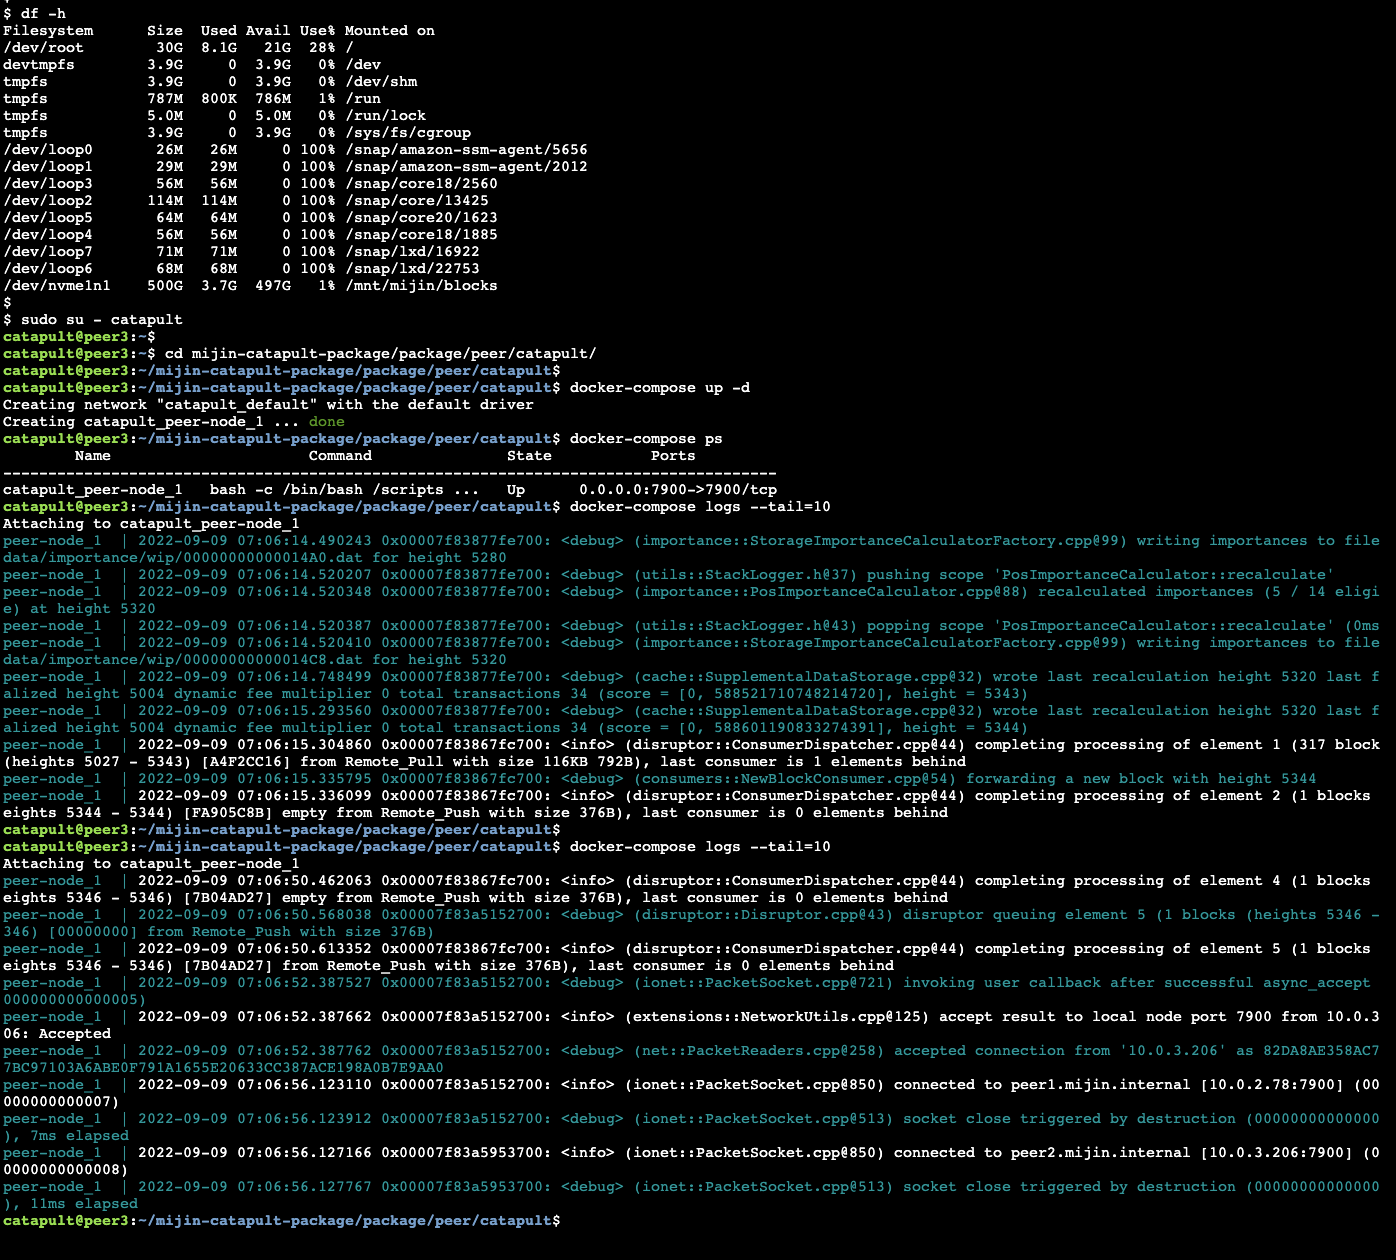
Make sure the disk is mounted, and start up mijin Catapult(v.2).
df -h
sudo su - catapult
cd mijin-catapult-package/package/peer/catapult/
docker-compose up -d
docker-compose ps
|
|